Hot Potato

As sweet and satisfying as any dessert, Mother Arlene’s sweet potatoes are always a hit at church potluck dinners, funeral dinners, and most especially at the Mother’s Day Feast hosted by the Baptist church. The recipe has been in Mother Arlene’s family for generations, and while she will gladly share it with anyone who asks, there is something extra special about the dish when prepared by Mother Arlene herself. That something extra is love, and it’s the ingredient Shirley Tedesco needs on the particular Mother’s Day she and her family spend with their best friends, the Roberts family, at their church.

The following recipe is the one I had in mind when creating the above-mentioned scene. The deep, rich flavor of these potatoes makes them a welcome addition to any dinner table, but don’t wait until Thanksgiving to enjoy them. Mother Arlene’s sweet potatoes will add spice to your middle-of-the-week menu and make you glad you tried them.

PS – Don’t be shocked by Mother Arlene’s inclusion of bourbon in her recipe. This Godly, graceful woman is no fool when it comes to using this classic, American spirit in moderation as a flavoring for her famous sweet potatoes just like her mother taught her. “Oh, honey—it’ll be our little secret,” she will say as she presses the recipe into your palm.

Mother Arlene’s Sweet Potatoes

5 large sweet potatoes

8 T unsalted butter

½ t sea salt

1 t ground cinnamon

½ t ground nutmeg

¼ t ground clove

¼ t ground ginger

Dash of allspice

¾ c sugar (I used raw)

½ c dark brown sugar

1 T vanilla

2 T bourbon

Preheat the oven to 350° F.

Wash the sweet potatoes and peel them. Remove any bad spots with a paring knife. Cut the sweet potatoes into slices about a half-inch thick and place them in a large bowl.

Place the butter in a medium saucepan over low heat. When the butter is melted, stir in the sugars, spices, vanilla, and bourbon. Keep over the heat until the sugars are melted.

Pour the syrup mixture over the sweet potatoes and stir to coat them thoroughly. Transfer the potatoes to a 9 x 13 glass baking dish taking care to scrape all the syrup mixture from the bowl into the baking dish.

Cover the baking dish with aluminum foil and bake the potatoes for 30 minutes. Remove the baking dish from the oven and carefully baste the sweet potatoes with the syrup mixture. Replace the foil on the baking dish and return it to the oven for another 15 – 20 minutes or until a small knife penetrates a potato slice with ease.

Remove the sweet potatoes from the oven and allow them to rest for 10 minutes before serving.

Enjoy!

Cue the Comfort

The great thing about comfort foods is that they are incredibly simple and extremely delicious. With that being said, it never hurts to play with a basic recipe to ramp up the flavors and increase the appeal. The ladies at the Baptist church where the Tedescos spent Mother’s Day in 1978 certainly knew this.

In my novel, The Tedescos, Joe took Shirley, Grandma Josephine, and the kids to the church where their best friends, Smiley and Charlene Roberts, attended. Since it was Mother’s Day, the men had to do all the cooking and serving, but you can be sure it was under the direction of the ladies who wanted to guarantee that their best recipes turned out right.

One of the side dishes featured was classic macaroni and cheese. What the ladies at the Baptist church knew was that good food didn’t have to be fancy; it just had to taste like a little piece of Heaven. I imagine the following recipe is something like what these excellent cooks would have been proud to set out on the food table, perhaps with a bit of a flourish. It’s the type of comfort food that will have guests coming back for seconds and thirds.

Macaroni and Cheese as featured in the Ladies Auxiliary Cookbook

1 – 1 lb. box of elbow macaroni

½ c (1 stick) unsalted butter

½ c all-purpose flour

4 c whole milk

3 – 8 oz. blocks* of cheese, shredded

1 t salt

½ – 1 t black pepper (I used a coarse grind)

1 t dry mustard

10 – 12 slices of provolone cheese

Parmesan cheese

Cook the macaroni al dente according to package instructions. Drain thoroughly as macaroni holds a lot of water in the crook of the elbow. While the macaroni is draining, use the hot pot you cooked it in to melt the butter over a low heat. Add the flour and whisk until smooth. Cook for one minute over a low heat and do not let it burn. Slowly add the milk, whisking thoroughly, and cook for another minute over medium heat.

Preheat your oven to 400° during the next part.

Add the cheese by handfuls, stirring after each addition. Continue cooking until the cheese melts and becomes stringy. Not all the cheese may melt, but this is acceptable. The liquid portion of the mixture will still thicken quite nicely.

Add the drained macaroni to the mixture and stir to coat. Carefully pour the mixture into a 9 x 13 glass baking dish. (Do not panic if it seems soupy. The extra liquid will be absorbed and make the macaroni and cheese creamy.) Top with the provolone slices and liberally sprinkle with Parmesan cheese. Bake at 400° for 25 minutes or until the cheese on the top browns and bubbles. Let the macaroni and cheese sit for ten minutes before serving.

Toasted cheesy deliciousness!

*Side note:  I start with blocks of cheese over pre-shredded because it’s creamier. The pre-shredded stuff always seems dry to me. Also, I suspect the quantity isn’t exactly what the packaging says. You’ll want at least six cups of cheese, however, I’ve found that a little more never hurts which is another reason I prefer blocks of cheese. When choosing cheeses, I like to include at least one orange cheese to make it look like traditional, American macaroni and cheese.

Rollin’ in the Dough

Who nibbled my cookie?

I suspect my mother’s fondness for black licorice was what set me on the path to loving zesty sweets. In addition to anything black licorice, I enjoy cinnamon, clove, peppermint, anise, and ginger candies and gums. I consider myself one of the lucky ones that these six fall within my range of favorite flavors. Some people would not consider this a plus, and I’ll bet I could tell you exactly on which flavors we would disagree.

I think it’s a genuine shame that there are people in the world who don’t like—nay, love—licorice and anise. In fact, I recently read a blog post where the woman ranted on and on about how evil licorice is. I actually felt sorry for the poor, misguided soul. The sad thing is, if one does not like licorice, there is a good chance its cousin, anise, will not be appreciated for the taste bud-stimulating wonder that it is.

Now before you wrinkle your nose and click another site, allow me to introduce a buttery cookie that is slightly reminiscent of shortbread only more tender with a sweet, deeply satisfying herbal presence. As my cousin recently said, one either loves or hates anise. As a fan of anise, the following cookie recipe was an obvious choice to appear in my novel, The Tedescos.

Grandma Josephine Tedesco makes a batch of these delicious, brightly decorated cookies as dessert following the dinner during which her youngest son, Danny, introduces his latest girlfriend to the family. I imagine anisette cookies were a staple in the Tedesco household as they are easy to make.

While no one is going to force you to try something you don’t like, I do believe you will do yourself an injustice if you don’t give Italian anisette cookies a chance. The festive little cookie makes a pretty presentation on the plate and is perfect for any occasion or to simply enjoy with a cup of coffee or tea.

Josephine Tedesco’s Italian Anisette Cookies

For the dough:

1/2 c unsalted butter, softened

1/2 c sugar (I used raw)

3 large eggs

1/4 c milk (I used whole milk)

¼ t LorAnn’s anise oil**

½ t vanilla extract

3 ¼ c all-purpose flour

1 T baking powder


For the glaze:

2 c powdered sugar

3 – 4 drops of LoAnn’s anise oil

3 T water

Nonpareils


To Prepare the Cookies:

Preheat your oven to 350° F. Line two large baking sheets with parchment paper and set aside.

Cream the butter and sugar together in the bowl of a standing mixer for a few minutes until light and fluffy. Add the eggs and beat well until the mixture is frothy. Add the milk, anise oil, vanilla extract, and mix until combined.

In a separate bowl, sift the 3 cups of flour and the baking powder. Add the dry ingredients to the wet in three increments, mixing until just combined. Place the dough on a sheet of plastic wrap long enough to cover all sides. Gently press the dough into a square about two inches thick.

Once the dough is shaped, cut the square into four equal pieces. Cut each slice in half lengthwise, and then cut those pieces in half lengthwise again. Cut each of the four strips of dough into six pieces and roll them into balls. The individual dough balls should be approximately one inch in diameter. Repeat with the remaining dough. This should yield approximately 96 cookies.

Place the dough balls on the parchment-lined baking sheets and leave about 1 ½ inches between them on all sides. Bake the cookies for 10 minutes, or until they are very lightly browned on the bottom. Transfer them to a rack to cool completely.


For the glaze:

Once the cookies have cooled completely, whisk together 2 cups of powdered sugar, 3 – 4 drops of anise oil, and 3 tablespoons of water. The glaze should be thick but not dry. Dip the tops of the cookies into the glaze and return to the cooling racks. Sprinkle each cookie with nonpareils. Allow the glaze to harden before storing or stacking for presentation.

Enjoy!

**I prefer LorAnn’s anise oil over anise extract because the oil really packs a punch of flavor in these cookies. If anise isn’t your thing, consider LorAnn’s lemon or orange oil.

Six of One, Half Dozen of the Other

Shirley Tedesco loves her mother-in-law. Really. But since Grandma Josephine never quite forgave Shirley for stealing her oldest son away and marrying him, well, let’s just say there is an undercurrent of tension between them, and that tension never comes out more than when Joe’s younger brother, Danny, visits.

Danny is the family screw-up who frequently cons his mother into investing in his latest stupid, money-making scheme. Joe, without Shirley’s knowledge, sometimes bails his brother out. So when Joe announces that Danny is coming for dinner and bringing his new girlfriend, Shirley is not at all happy.

Ratchet up the tension between Shirley, who is not pleased, and Grandma, who is thrilled. But the ladies are civil, and their chosen battlefield is the kitchen where each whips up the best of her recipes; Grandma to please her baby boy, and Shirley to simply not be outdone.

The following recipe for yeast rolls is the one I had in mind when choosing what Grandma Josephine would make. These rolls are little, handheld clouds of deliciousness. Light and tender, rich and satisfying, you will find yourself whipping up a batch of these easy-to-make delicacies if for no other reason than to indulge in a pan of them sans a meal!

Grandma Josephine’s Yeast Rolls

4 teaspoons active dry yeast

1 ½ c warm milk (about 100° F to 110° F)

4 ¼ c bread flour

1 large egg, beaten

2 t salt (I use kosher or sea salt)

3 T granulated sugar (I use raw)

½ c unsalted butter (1 stick), melted and cooled to lukewarm

For the Topping:

1 egg

1 teaspoon water

Pinch of salt

Generously butter a 9 x 13 x 2-inch metal baking pan.

In the bowl of an electric stand mixer, combine the yeast and 1 t of the sugar with the warm milk. Let stand for one to two minutes until the yeast blooms.

Add the flour, the egg, 2 teaspoons of salt, the rest of the sugar, and the melted butter. Using a dough hook, mix on low speed until combined.

Increase the mixer speed to medium and continue to mix for 7 minutes. You can add a teaspoon or two of flour as needed to encourage  the dough to pull away from the sides of the bowl, but not so much that you make the dough tough.

Turn the dough out onto a lightly floured surface and knead a few times to form a ball that is springy and elastic. Place the ball of dough in a well-oiled bowl. Turn to oil both sides. Cover tightly with plastic wrap. Allow the dough to rise in a warm place for about 1 hour, or until doubled in size.

Gently punch down the doubled dough and turn it out onto a lightly floured surface. Use a sharp knife to cut the dough into 24 uniform pieces and shape them into balls.

Place the individual dough balls in the buttered baking pan to make four rows of six (24 rolls). Cover lightly with a clean dish towel and let rise in a warm place for 20 to 30 minutes.

Heat the oven to 375° F.

When the rolls have risen, whisk an egg with 1 teaspoon of water and a pinch of salt until well blended. Gently brush the tops of the rolls with the egg wash mixture. Bake for 15 to 20 minutes, until the rolls are golden brown and sound hollow when tapped.

Remove the rolls from the oven and allow them to rest for 10 minutes. Serve warm with butter, jelly, jam, or honey.

Enjoy!

Can She Bake a Cherry Pie, Charming Billy?

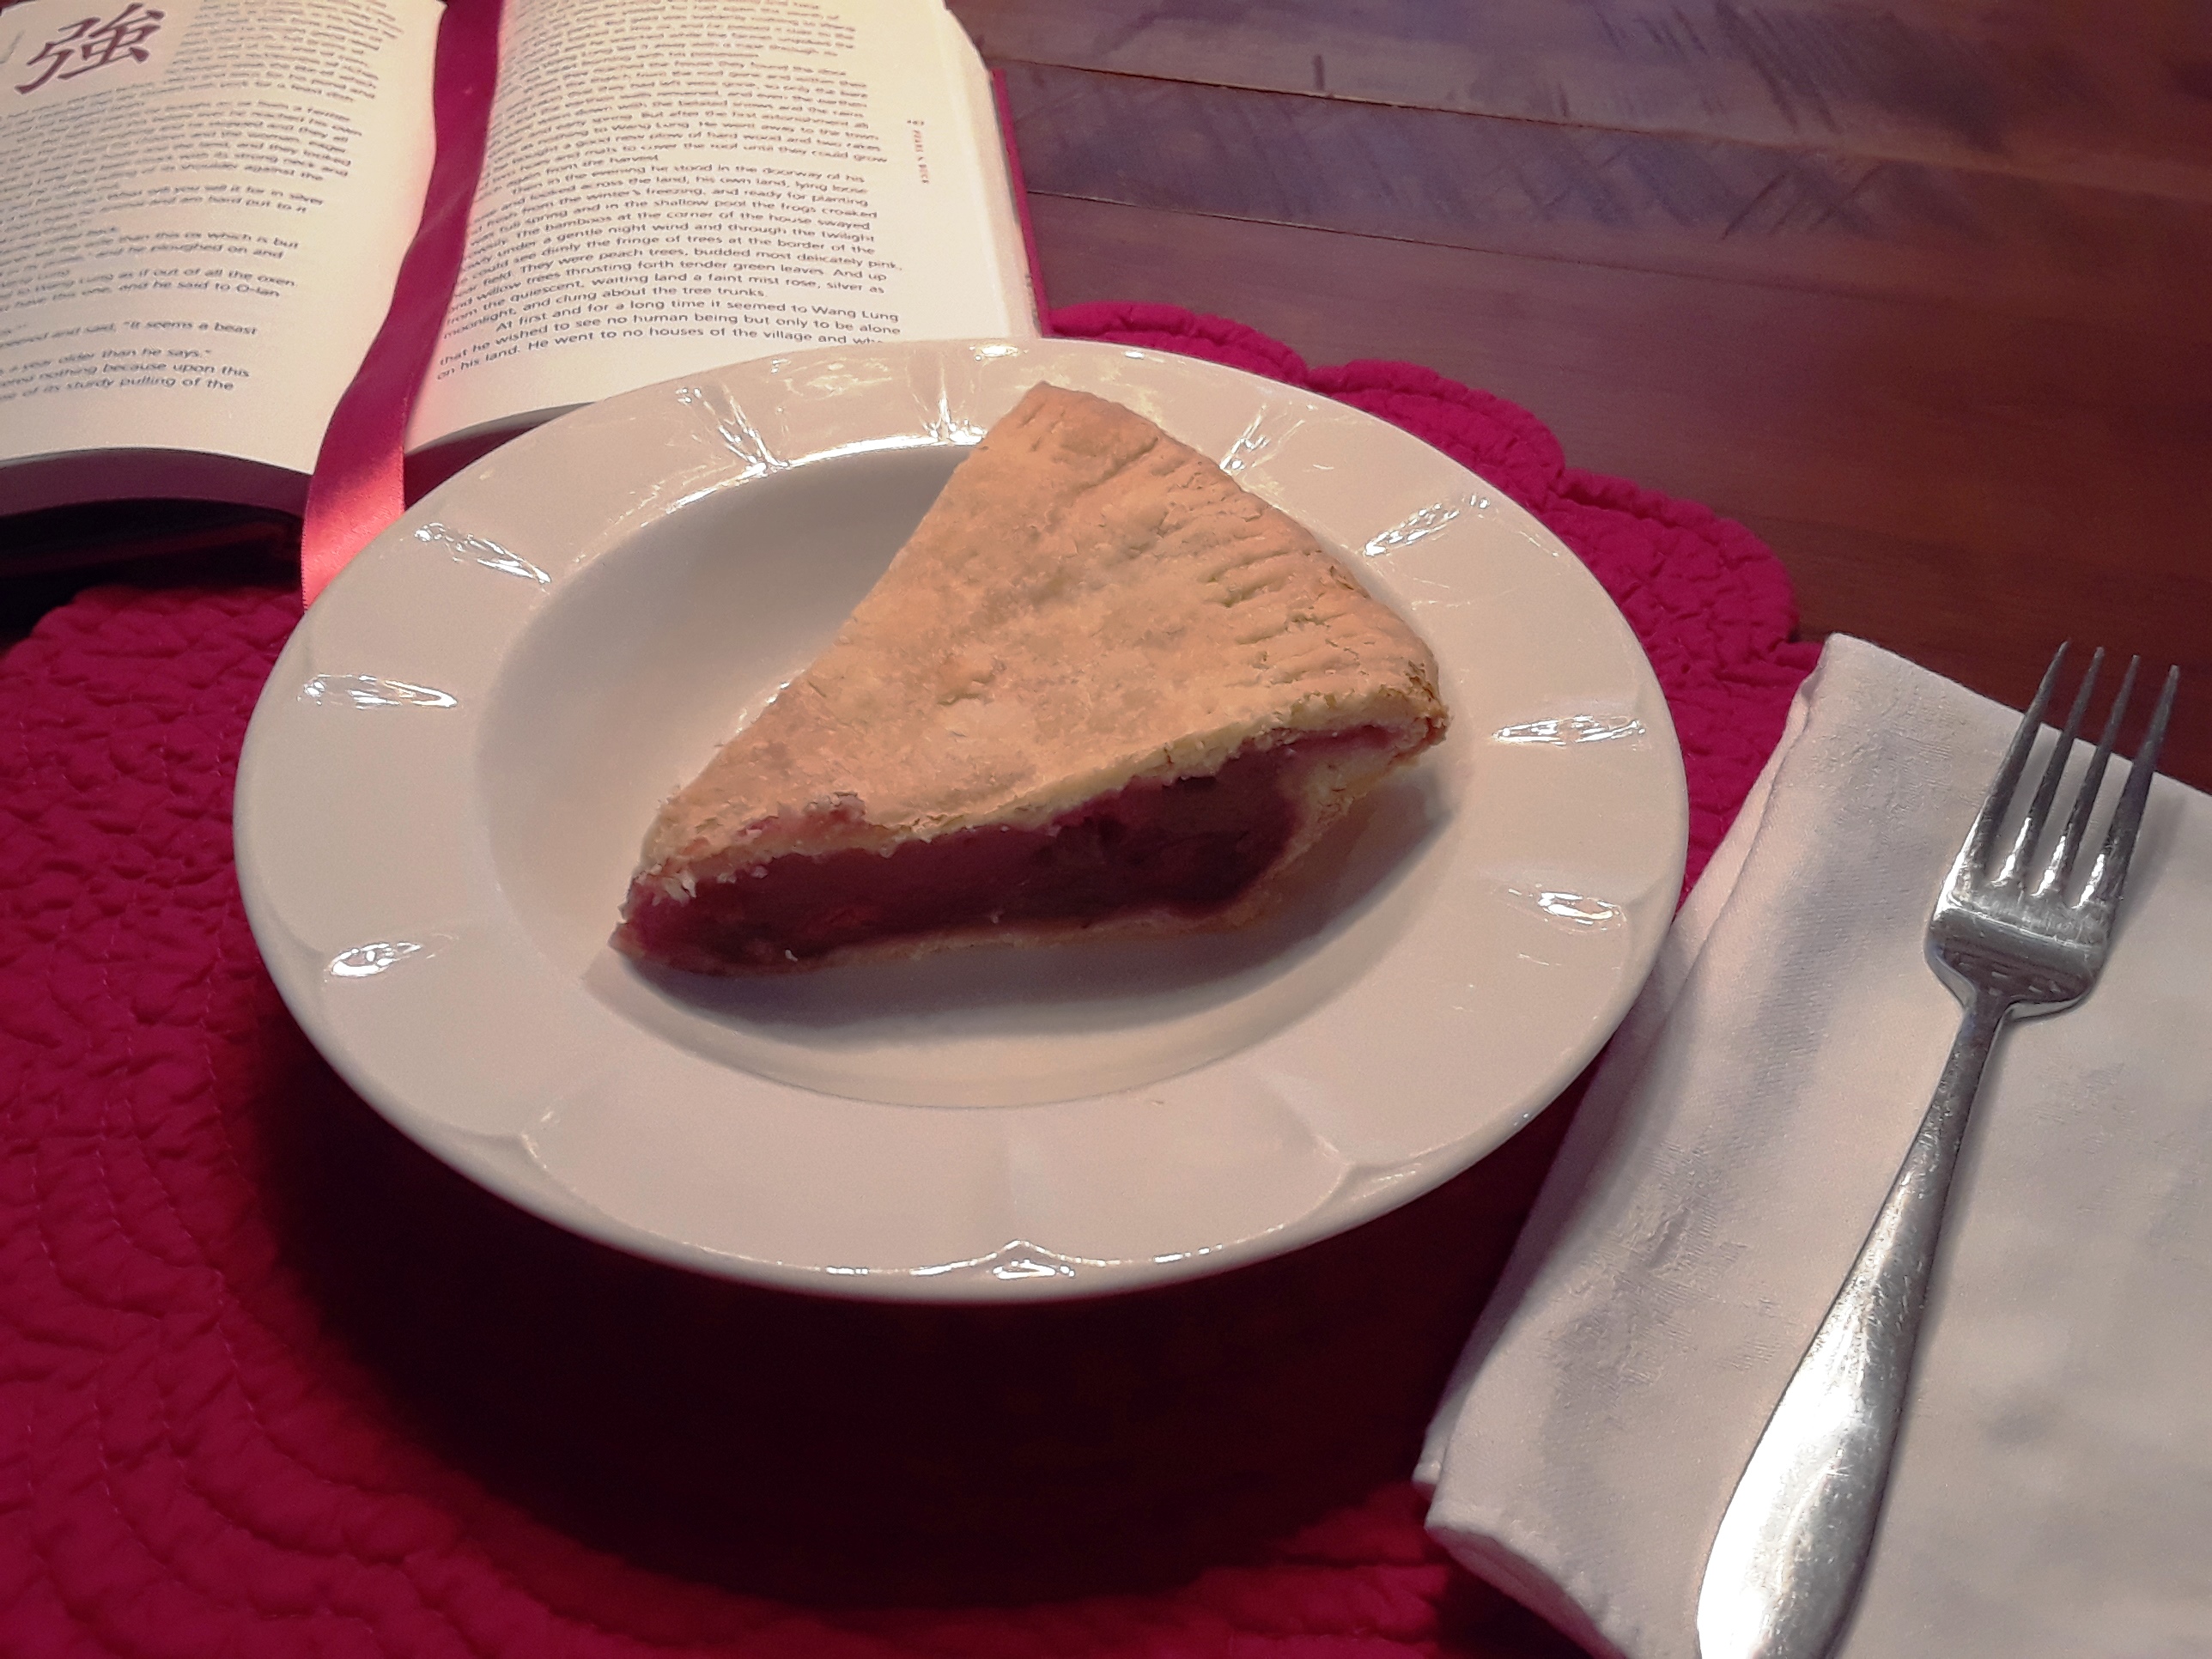
First place in the church pie bake off is in Shirley Tedesco’s sights. Ever since she joined as a newly-wed wife, her goal has been to reach the coveted spot held for far too long by fellow contestant, Claudia Romero. A sour cherry rhubarb pie is Shirley’s first third-place win, and Claudia can feel the younger woman breathing down her neck as she inches closer with every delicious baked creation.

I included cherry pie in my novel, The Tedescos, because it’s been a favorite since childhood. As delicious as sweet cherry pie is, there is just something—how can I describe it—more old-fashioned tasting about a sour cherry pie. The inclusion of rhubarb, traditionally featured alone or in combination with strawberries, makes Shirley’s pie a titch more special. Then there is the addition of a few ingredients even Claudia can’t discern.

Sour cherries were more readily available when I was younger. These days I have to travel a bit to find them, but they are worth it. Their too-short season of availability makes them even more desirable. If you can pick and pit your own, do so. However, fresh, pitted sour cherries can be purchased from farmer’s markets. I’ve heard good things about particular brands of jarred sour cherries in syrup, but I’ll let you do your own research and taste testing. Buying frozen sour cherries is an absolute last resort. I will say, though, that if you freeze sour cherries yourself, you’ll have better luck with them because the delicate fruit won’t be bashed about during transport and the defrosting process can take place slowly in your refrigerator.

Pre-picked and pitted sour cherries come in juice. Measure out four cups to a bag (enough for a ten-inch pie), and freeze them. Take care to evenly distribute the juice and don’t stack the bags on top of each other or place them where other frozen items will be stacked.

Rhubarb is easier to find in grocery stores and can be frozen until used. Neither the amount of red on the stalks nor the width has any bearing on the flavor. Wash the stalks, trim the ends, pat them dry, and cut into half-inch pieces. Lay the cut rhubarb in a single layer on a baking sheet with edges, freeze them for a couple of hours, and transfer the frozen pieces to a large plastic bag that can be sealed. Return them to the freezer immediately.

Because I freeze fruits and vegetables in amounts for one pie, the following recipe makes two pies because I’m combining sour cherries and rhubarb. Don’t be overwhelmed by the quantity, though. The pies will get eaten, and if you’re feeling guilty about consuming too much pie, you can always give one away or cut the recipe in half.

One last note: this recipe uses fresh sour cherries that came in their own juice. If you use cherries you picked, you’ll need to cook them with a little water, store bought cherry juice, or liquid from cherries you juiced yourself to soften them and bring out their natural juices.

Shirley Tedesco’s Sour Cherry Rhubarb Pie

For the Crust:

4 c all-purpose flour

2 t sea salt

4 sticks cold, unsalted butter, cut into ½ inch pieces

Ice water

Sift the flour and salt into a bowl. Work butter into the flour/salt mixture until it resembles coarse meal. A pastry blender or two knives is recommended, but you can work quickly with your hands so the mixture stays cool. Add ice water a little at a time, forming a dough ball with your hands. Wrap in plastic wrap and refrigerate while preparing the filling. Preheat your oven to 375° while the dough is chilling.

For the Filling:

4 c sour cherries, with their juice

4 c rhubarb, cut into half-inch pieces

3 c sugar (I used raw)

4 T kirsch

⅛ t mace

1 t sea salt

4 T butter

6 – 9 T corn starch

In a large pot over a medium heat, add the sour cherries with juice, rhubarb, and sugar. Stir gently to incorporate the sugar but not break apart the fruit/veg. When the sugar is melted and the mixture begins to steam lightly, add the kirsch, mace, butter, and salt. Stir gently.

Start with six tablespoons of cornstarch in a bowl and ladle hot liquid from the pot into the bowl until there is equal dry to wet. Stir the corn starch and juice until thoroughly blended, and then slowly pour it back into the pot. I pour the mixture into a particularly juicy area and whisk quickly to incorporate. Gently stir through the mixture and increase the heat to medium high to thicken the juice. Only use the remaining three tablespoons if your sour cherries and rhubarb are particularly juicy. Keep a close eye on the mixture so the bottom doesn’t burn. When the sour cherries and rhubarb are thickened, set them aside to cool.

Assembling the pie:

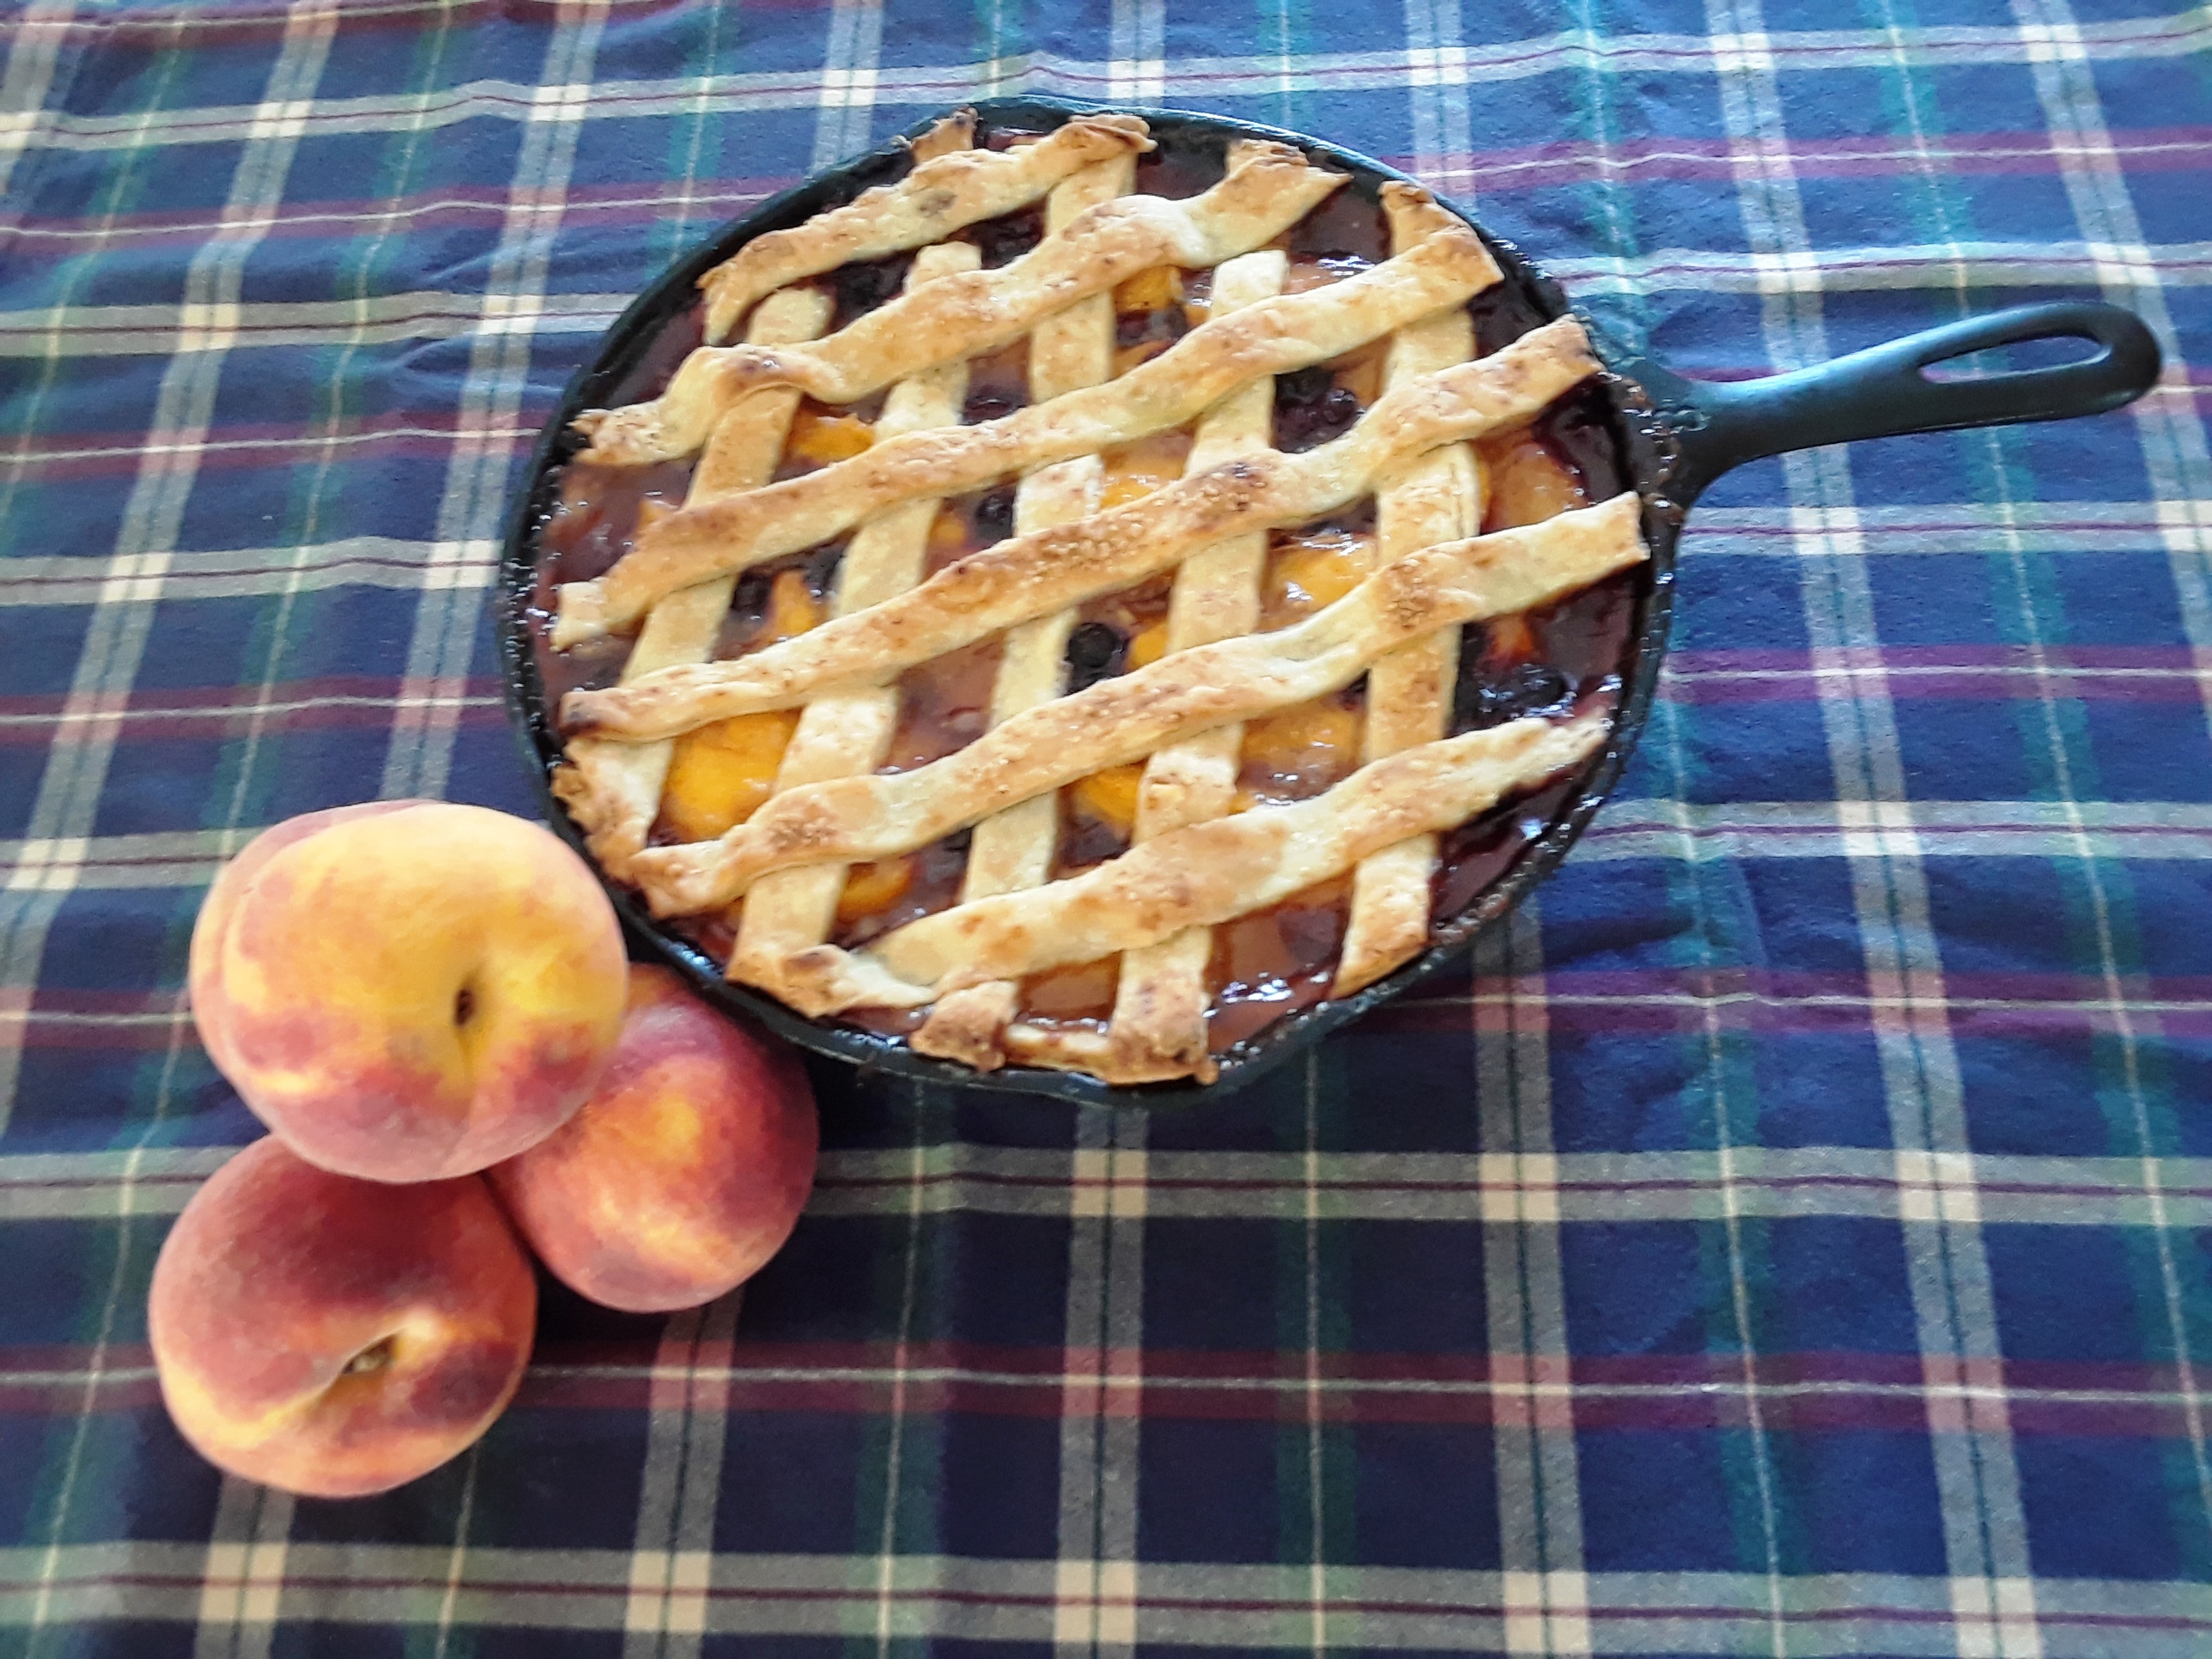
Remove the dough from the refrigerator and divide it into quarters. Return the other three to the refrigerator while working. Roll one quarter into a circle to cover the bottom of a ten-inch pie plate. Place the dough in the bottom of the pie plate and trim the edges to fit. Remove and roll another quarter for the bottom of the second pie and trim the edges.

Divide the sour cherry/rhubarb mixture between the bottom crusts by ladling it in. Remove and roll another quarter of dough for a top crust. Place it over the filling and tuck the edges of the top crust beneath the bottom crust. Crimp the edges between your fingers or seal them with the tines of a fork. Do the same with the last dough quarter for the second pie.

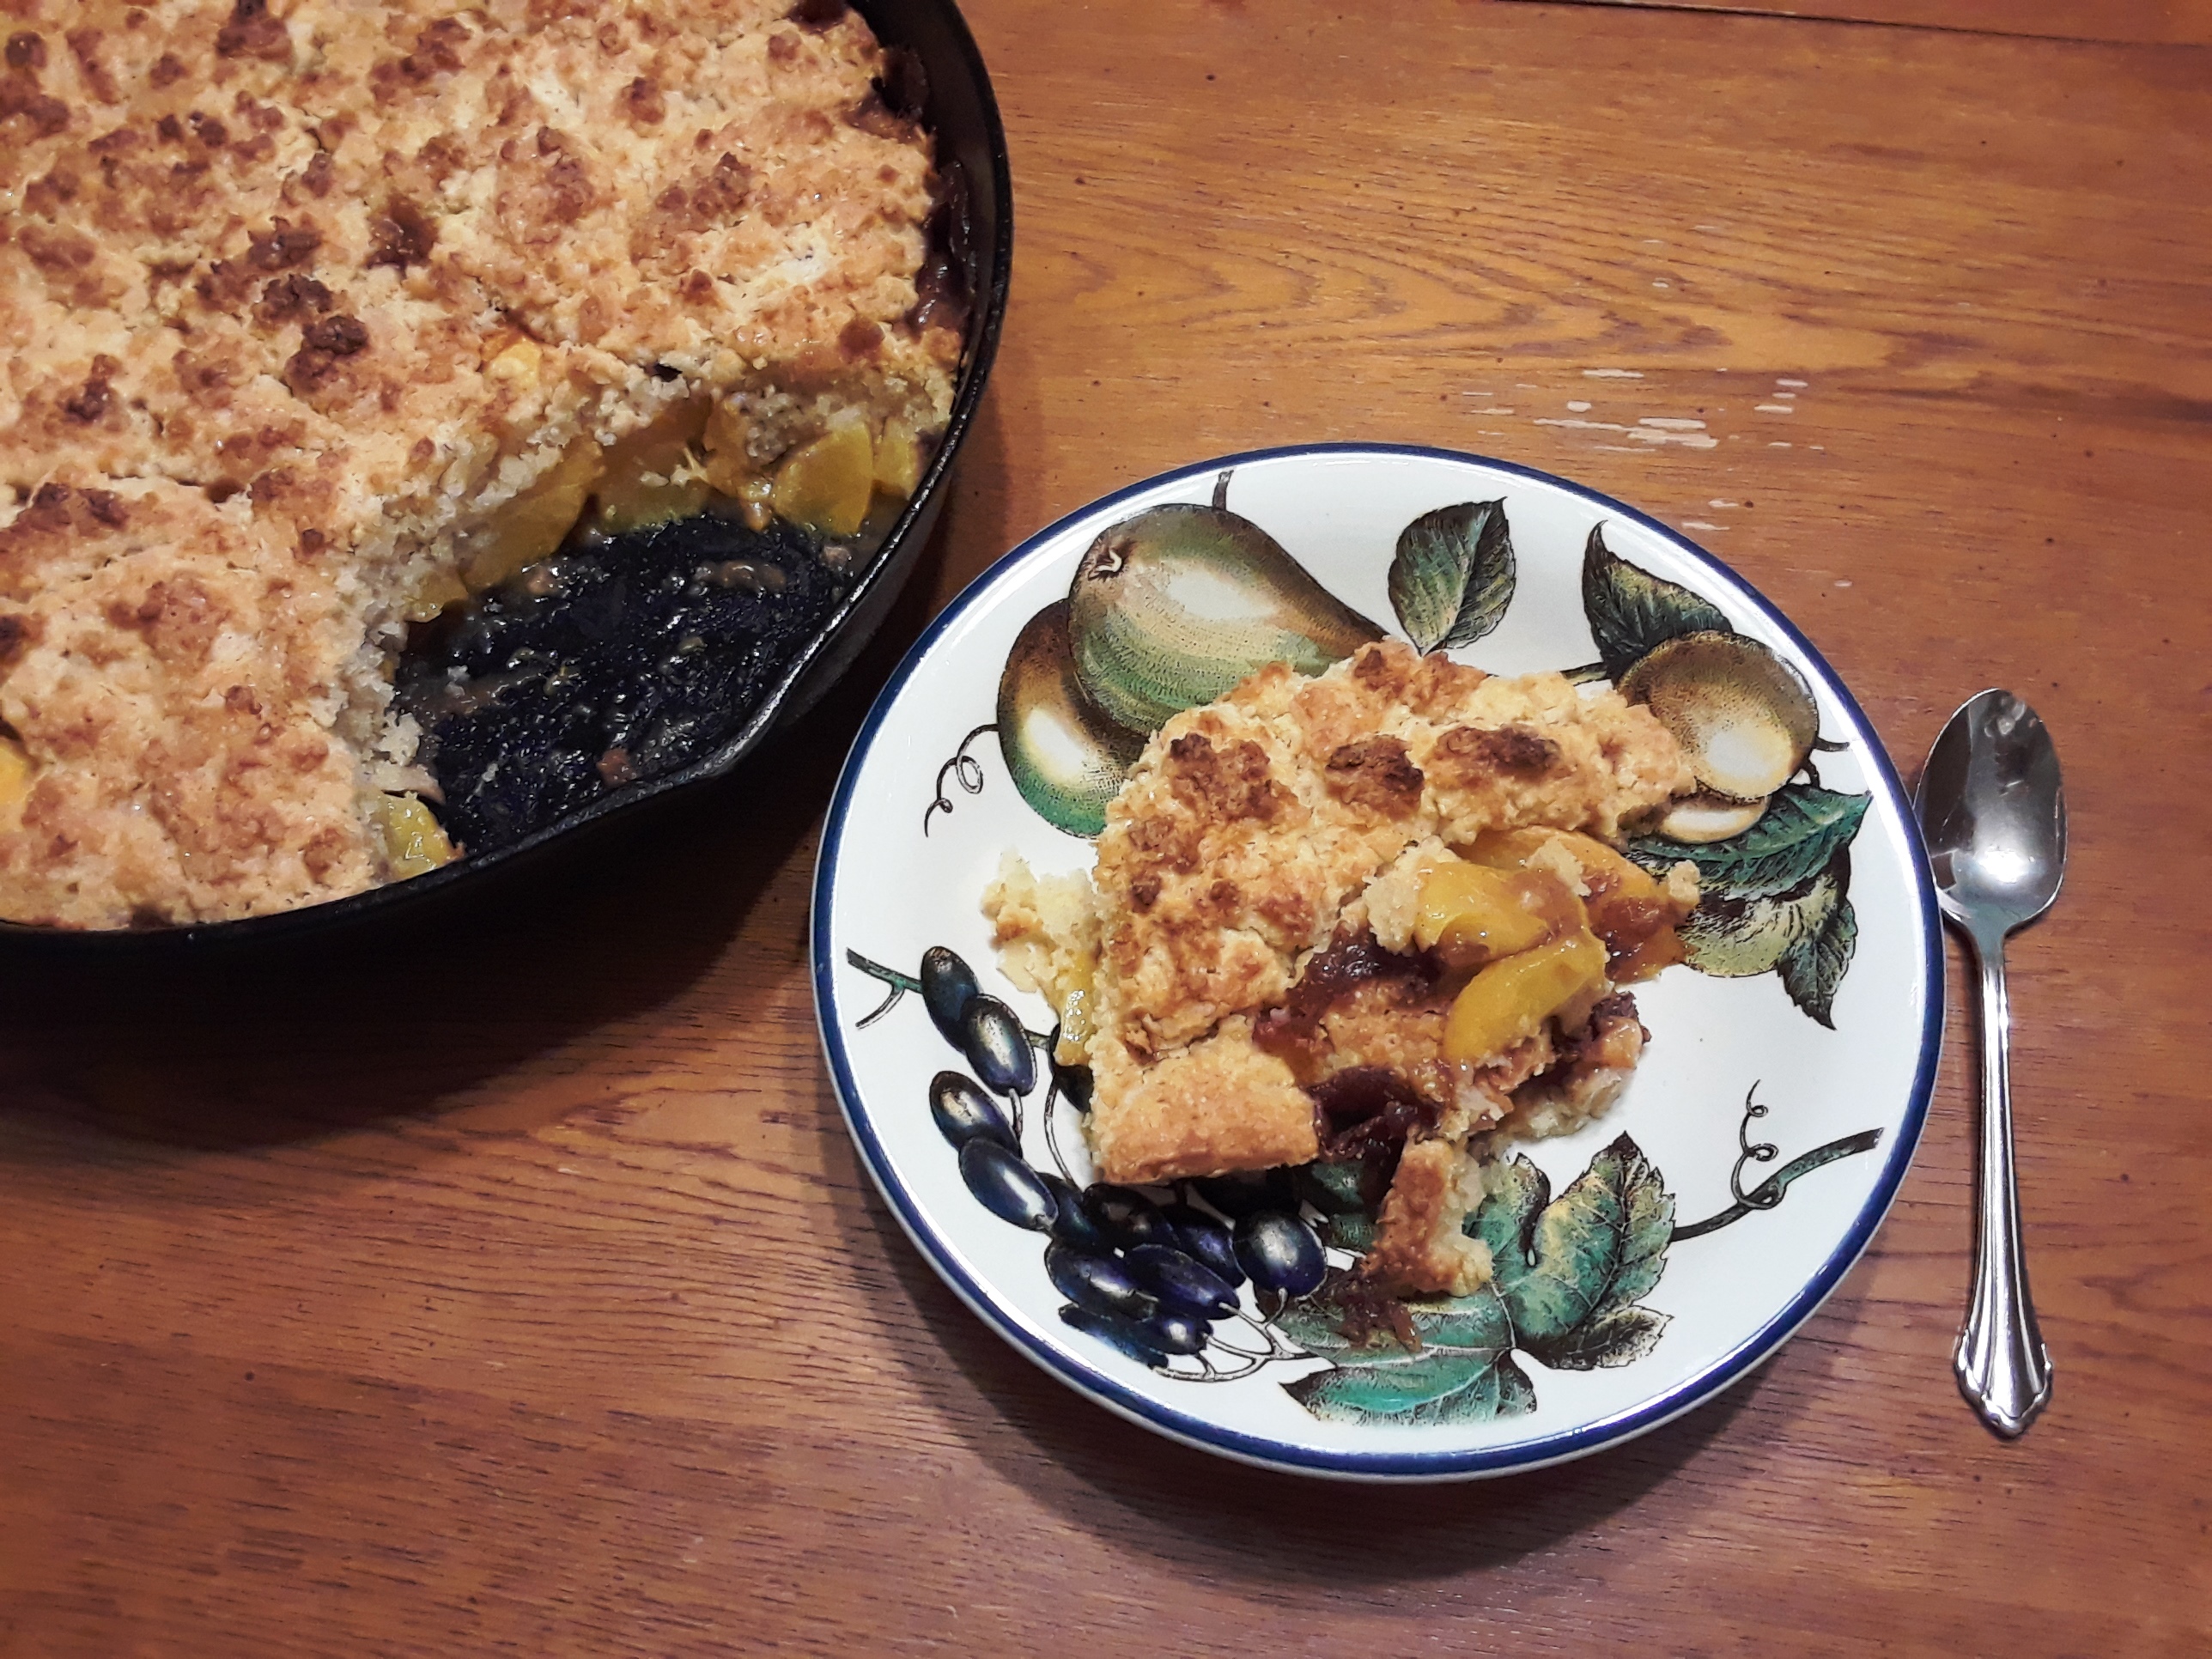
Place the pies on the middle rack of the oven with a baking sheet on the rack below to catch any drips. Bake the pies for 45 minutes, and then check them. You may need to keep baking in ten-minute increments until the crusts are golden brown. Allow the pies to rest for fifteen minutes to set up. Serve with fresh whipped cream or vanilla ice cream.

Enjoy!

Even Peaches Have Stones

You’ve heard it said that the way to a man’s heart is through his stomach. Fortunately, good food eaten in the company of great friends also reaches a woman’s heart, and Shirley Tedesco’s heart definitely needs reaching one particular Mother’s Day.

Shirley and Joe Tedesco have recently experienced some heartbreak, but it’s Shirley who is having a hard time getting back into the swing of things. On the outside, she appears to be the same wonderful wife and mother she’s always been. Fortunately, Joe can see through the warm and fuzzy façade to the broken heart within, and he won’t let his wife’s heart turn to stone.

Together with their best friends, Smiley and Charlene Roberts, Joe plans a Mother’s Day surprise for Shirley that includes delicious food sure to melt anyone’s defenses. Shirley understands that she’s been loved from the inside out, and the once unhappy mother finds the strength to direct her heart back to her family.

I featured peach cobbler on the Mother’s Day menu at the church where Smiley and Charlene attend. The following recipe is the one I had in mind for the above-mentioned scene. It’s easy to make, but it looks quite impressive and tastes like you slaved over it.

Old-Fashioned Peach Cobbler

8 Georgia peaches, peeled and sliced, about 6 to 8 cups

¼ c bourbon

¼ c dark brown sugar

2 T corn starch

1 t ground cinnamon

2 t vanilla


Dumplings:

1 1/2 c all-purpose flour

½ c raw sugar, plus more for dusting

2 t baking powder

1/2 t sea salt

16 T (2 sticks) cold unsalted butter

3/4 c heavy cream, plus more for brushing


Heat the oven to 375° F.

In a large bowl add the peaches, bourbon, dark brown sugar, cornstarch, vanilla, and cinnamon. Mix well to coat the peaches evenly. Set aside.

To prepare the dumplings, sift the flour, baking powder, and salt into a bowl. Add the sugar, and stir to mix well. (The large crystals of raw sugar will not pass through a sifter.) Cut twelve tablespoons (1 ½ sticks) butter into small pieces.  Add it to the flour mixture and cut it in with a pastry blender or your hands until the mixture looks like coarse bread crumbs.  Pour in the cream and mix just until the dough comes together.  Don’t overwork; the dough should be slightly sticky but manageable.

In a twelve-inch cast iron skillet over medium-low heat, melt the remaining four tablespoons butter.  Add the peaches and cook gently until heated through, about five minutes.  Drop the dough by tablespoonsful over the warm peaches. There can be gaps as the dough will puff up and spread out as it bakes.  Brush the top of the dumplings with heavy cream and sprinkle with sugar. Put the skillet into the oven with a baking sheet on the next rack down to catch any drips.  Cook for 40 to 45 minutes until the top is browned and the peach juice is bubbling.

Allow the cobbler to sit for five minutes, and then serve it warm with fresh whipped cream or vanilla ice cream. Enjoy!

When Georgia Gets the Blues

Pie baking is serious business, and you don’t want to get in the way of a young wife determined to climb up the church-pie-bake-off hierarchy to a first place win. Such was the case for newly-wed Shirley Tedesco when she found the outlet to express her skill with cooking. But Shirley’s baked wonders get up Claudia Romero’s nose. Claudia, who frequently holds the position of president of the Ladies Auxiliary, has held the coveted first place position for years. In Shirley, the woman has met her match.

The following recipe is just one of Shirley’s pies featured in my novel, The Tedescos. I’ve fallen in love with Georgia peaches, so if you can get them in your area, I strongly recommended using them. I’ve been most fortunate to purchase these luscious, little jewels from The Peach Truck once or twice a year. The addition of blueberries to this pie not only makes it taste divine, but the blended color of juices is beautiful to behold!

Deep Dish Blueberry Peach Pie

For the crust:

2 c all-purpose flour

2 sticks unsalted butter, chilled and cut into ¼-inch cubes

⅓ c ice water

1 t sea salt

1 T sugar (I used raw)


For the filling:

2 T unsalted butter, cubed

6 large Georgia peaches, peeled and sliced

1 pint blueberries, washed and drained

½ c sugar (I used raw)

½ c dark brown sugar

½ t cinnamon

¼ t nutmeg

1 t vanilla

¼ c water

¼ c amaretto

2 T cornstarch


Parchment paper

Baking weights

Ten-inch cast iron skillet


In a large, metal mixing bowl that has been chilled, combine the flour, salt, and sugar. Add the chilled butter. Cut the butter in with a pastry blender, two knives, or your hands. If you use your hands, take care to work quickly so as not to warm the butter. The mixture should look coarse with pea-sized pieces of flour and butter. Add the water a tablespoon at a time, mixing it in carefully until you can press the dough together and form a neat ball. Remove the dough ball from the bowl and flatten it into a disk on a lightly floured surface. Wrap the dough in plastic wrap and chill for at least fifteen minutes.

Preheat your oven to 375°. Remove the dough from the plastic wrap and cut it into two pieces approximately one-third and two-thirds. Rewrap the one-third piece for the lattice top and return to the refrigerator. Role the larger piece into a circle big enough to fit across the bottom and up the sides of a ten-inch cast iron skillet. Cut a piece of parchment to fit the diameter of the skillet as well as up the sides (crumpling the parchment in your hands makes it more pliable for use). Place baking weights in the skillet. Bake for ten to fifteen minutes or until the crust is lightly golden. Set aside to cool.

In a separate skillet, melt the butter for the filling. Add the remaining filling ingredients except for the blueberries. Cook until the liquid reduces to a syrupy consistency. Stir in the blueberries. Spoon the filling into the bottom crust with a slotted spoon. Ladle the thickened syrup over the fruit a little at a time so it doesn’t come up over the edge of the bottom crust. (Juicy peaches yield more liquid.)

Roll out the remaining dough to approximately ⅛-inch thick and cut into ½-wide pieces as long as the skillet.

For the truly talented: Lay eight strips across the pie. Fold back every other strip, and lay a horizontal strip across the center of the pie. Unfold the folded strips, and then fold back the remaining strips. Lay another horizontal strip across the pie. Repeat folding and unfolding the strips to weave a lattice pattern. Repeat on the remaining side.

For people like me: Lay your strips in one direction taking care to leave space between them. Lay the remaining strips in the other direction also leaving space between them. Voilà! Lattice on a pie so delicious that no one notices it’s not woven.

Sprinkle the top with sugar. Bake the pie for thirty minutes or until the crust is golden and the juices are bubbling. You may need a cookie sheet beneath the pie in the oven to catch drips. Allow the pie to stand for at least ten minutes, and then serve it warm with vanilla ice cream or fresh whipped cream.

Enjoy!

Side Note: Baking weights can be purchased at most cooking stores, but I find a bag of dry beans works just as well. They don’t impart flavor to your baked goods, and once they’ve cooled, you can store them in a sealed jar for future use.

Southern Comfort Food

I couldn’t hold up this recipe for cornbread because a lovely wedge with melting butter is pictured with the southern fried cabbage I featured in a previous post. If you’re drooling right about now, imagine how Joe Tedesco feels when he spies this duo on the serving tables at the Mother’s Day celebration hosted by the Baptist church where his and Shirley’s friends, Smiley and Charlene Roberts, attend.

Naturally, Italian food tops the list of Joe’s favorites, but he’s willing to experience a little cross-cultural, culinary revolution if it means he gets to eat to his heart’s content.

Cast Iron Cornbread

5 tablespoons unsalted butter, melted

1 cup cornmeal

3/4 cup all-purpose flour

2 tablespoons sugar (I use raw)

1 1/2 teaspoons baking powder

1/2 teaspoon baking soda

1 teaspoon salt

2 large eggs, lightly beaten

1 1/2 cups buttermilk

Cooking Spray

Preheat the oven to 425 degrees F. Lightly grease an 8-inch baking dish.

In a large bowl, mix together the cornmeal, flour, sugar, baking powder, baking soda, and salt.

In a separate bowl, mix together the eggs, buttermilk, and butter.

Pour the buttermilk mixture into the cornmeal mixture and fold together until there are no dry spots (the batter will still be lumpy). Pour the batter into the prepared baking dish. Allow it to stand for about five minutes to achieve a nice crown on the batter.

Bake until the top is golden brown and tester inserted into the middle of the cornbread comes out clean, about 20 to 25 minutes. Remove the cornbread from the oven and let it cool for 10 minutes before serving.

Side Note: This recipe can be doubled and baked in a twelve-inch cast iron skillet. Bake for 30 minutes and additional five-minute increments until a tester inserted into the middle of the cornbread comes out clean.

Southern Fried Solution

Joe Tedesco has a big heart, and he can see that his wife, Shirley, could use some cheering up for Mother’s Day. So, he pulls out all the stops when planning Shirley’s Mother’s Day celebration. Joe also has a big appetite, and the lure of a home-cooked meal is more than he can ignore. This is why the Tedesco Family will be attending church with their friends, Smiley and Charlene Roberts, on Mother’s Day. The Baptist church where Smiley and Charlene are members is hosting a meal in honor of mothers, and the dishes the men will prepare are the recipes their wives and mothers use. For Joe, this translates into culinary heaven. But really, the day is all about Shirley.

The following recipe is the one I had in mind for the above-mentioned scene in my novel, The Tedescos. This recipe is a meal unto itself, but when paired with other Southern favorites, then Joe is right in believing it’s ecstasy for the taste buds.

Southern Fried Cabbage

6 – 10 bacon slices

4 T butter

1 medium sweet onion, chopped

2 cloves garlic, minced

1 large head of cabbage, sliced or chopped

2 T Worchester sauce

3 T apple cider vinegar

2 T brown –OR– raw sugar

½ t hot Hungarian paprika –OR– ½ t Cajun seasoning

Sea salt

Black pepper (I used quad-colored peppercorns)

1 t crushed red pepper flakes (optional)

Side Note: I used an 8-oz. package of Applegate uncured turkey bacon for this recipe which produced less fat. You will need to increase the butter to 6 T to take the place of the bacon drippings should you choose to do the same.

Slice or chop cabbage, taking care to remove any ribs and the core, and set aside.

Stack the bacon slices and cut them into strips across the width. In a large skillet over medium heat, sauté the bacon until brown and crisp. Set the cooked bacon aside and reserve 2 T of drippings.

Add the butter to the reserved bacon drippings in the skillet. Add the onion and garlic and cook until the onion turns translucent. Add the Worchester sauce, apple cider vinegar, and sugar. Stir gently and allow the onions to caramelize slowly and the liquid to thicken as it cooks off. Return the bacon to the skillet and stir gently.

Add the cabbage and season with salt, pepper, and hot Hungarian paprika ­–OR– Cajun seasoning. Cover and allow the cabbage to cook down about half way. When the cabbage has begun to wilt, stir the mixture. Return the cover to the skillet and continue cooking until the cabbage is tender.

Remove the lid from the skillet to allow the excess liquid to cook off. Stir gently to coat the cabbage and keep it from burning. Sprinkle with red pepper flakes if using. Transfer to a serving bowl and enjoy!

Pretty Fly for a Seasoned Fry

What’s a hamburger without French fries? This is no doubt a question Joe Tedesco would ask anyone who tried to serve the popular sandwich without it’s equally famous side. It’s also a question Joe did not have to ask Charlie Rollins and Graham Silver when he attended their party. The pair knew enough about their unofficial guest of honor to know plenty of fries had better be on the menu if hamburgers were anywhere nearby. They went one better and offered seasoned fries unlike anything Joe had ever tasted.

The following recipe is the one I came up with for the above-mentioned scene. Even though Joe never had the chance to try the delicious fries, I hope you’ll enjoy them as much as my family did.

Seasoned French Fries

Eight large russet potatoes

1 ½ c all-purpose flour

1 ½ t garlic powder

1 ½ t onion powder

1 ½ t ground cayenne pepper

1 ½ t sea salt

1 ½ t black pepper (I used a coarse grind)

1 ½ t paprika

Peanut oil for frying

¾ c water, more as needed

Combine the flour, garlic powder, onion powder, cayenne pepper, salt, black pepper, and paprika with a whisk, mixing well. Set aside.

Wash and peel the potatoes. Place whole peeled potatoes in a bowl of salted cold water to keep them from turning gray. Remove one potato at a time and cut it in half lengthwise. Lay the flat side down, and cut the potato in half horizontally so you end up with a top half directly over a bottom half. Keep the halves together and cut them into ¼ inch strips. Do the same with the other half of the potato. Proceed in this fashion until all the potatoes have been cut into strips. Return the cut pieces of potato to the cold water while working on whole potatoes. Once all the potatoes have been cut into strips, drain them in a colander and rinse the cut potatoes with fresh cold water to remove excess starch. Pat the cut potatoes dry with a paper towel.

I used a heavy pot on the stove to heat my peanut oil and a candy thermometer to maintain exact heat. Heat the peanut oil to 350° F.

Add the ¾ c of water to the seasoned flour and whisk. Add more water in ¼ c increments and whisk until you have a thin batter. Place two large handfuls of potato slices in the batter and toss to cover. Excess batter will drop off when transferring the potatoes, but don’t shake off so much that your potatoes are thinly battered. Carefully place the battered potato slices in the hot peanut oil a few at a time until the surface of the oil is covered. An Asian strainer with handle is perfect for the task.

The temperature of the oil will drop a little with the addition of the cold potatoes. Maintaining 350° F will result in well-cooked, crispy fries. You may need to separate the fries as they cook to prevent sticking. When the batter turns a deep gold (approximately 10 – 12 minutes), the fries are finished cooking. Use the Asian strainer to remove the potatoes from the oil and drain them in a large bowl lined with paper towels. It is most important that the peanut oil returns to 350° before adding another batch of battered potatoes. When it does, proceed with the frying process until all the potato slices are cooked.

You may salt to taste if needed. The flavor of the seasoned batter becomes more evident once the fries have cooled to a temperature at which one can eat them without burning fingers or mouth.

Enjoy!