May I Take Your Order, Please?

I’m not a big fan of blog posts that are nothing but links, but a few people have requested this of me, and I dare not disappoint my loyal followers.  What they wanted to know was which recipes I featured from my novel, The Secrets of Dr. John Welles, went together to create the meals.  I didn’t write the posts in order, and since my novel has yet to be published, I thought I’d do them this favor.

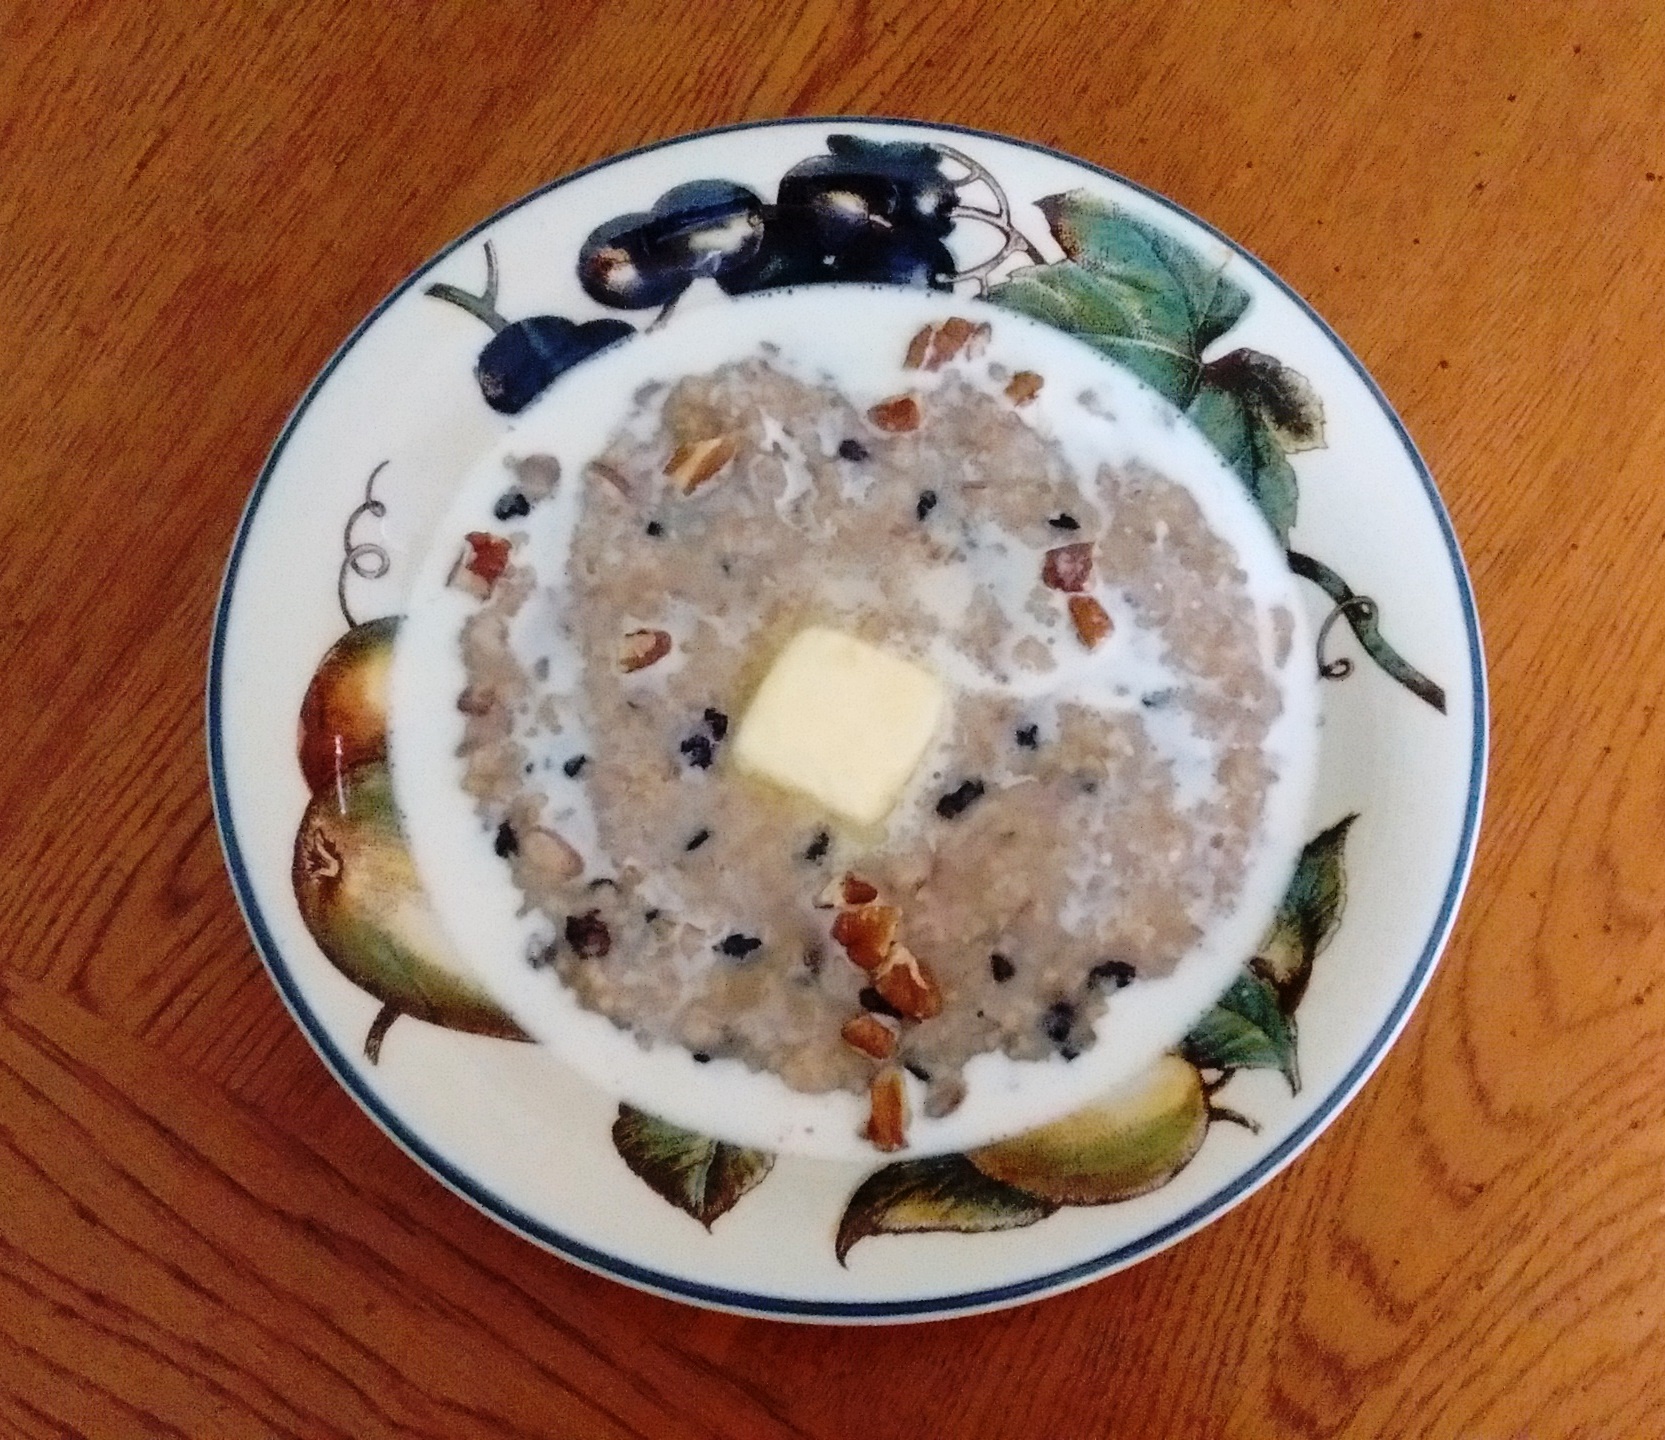
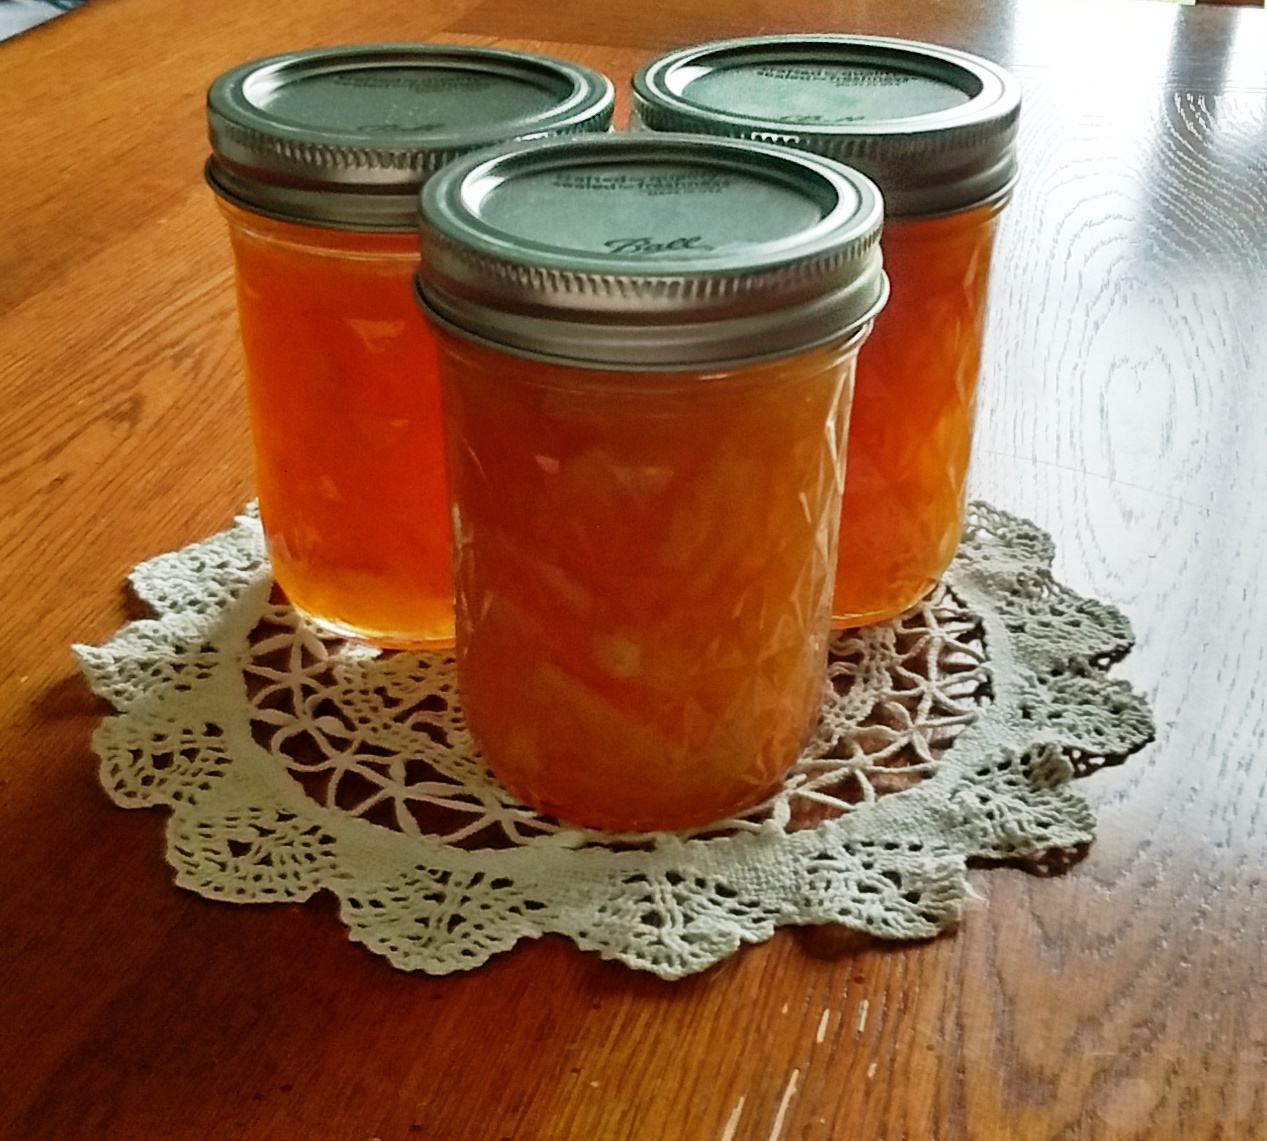
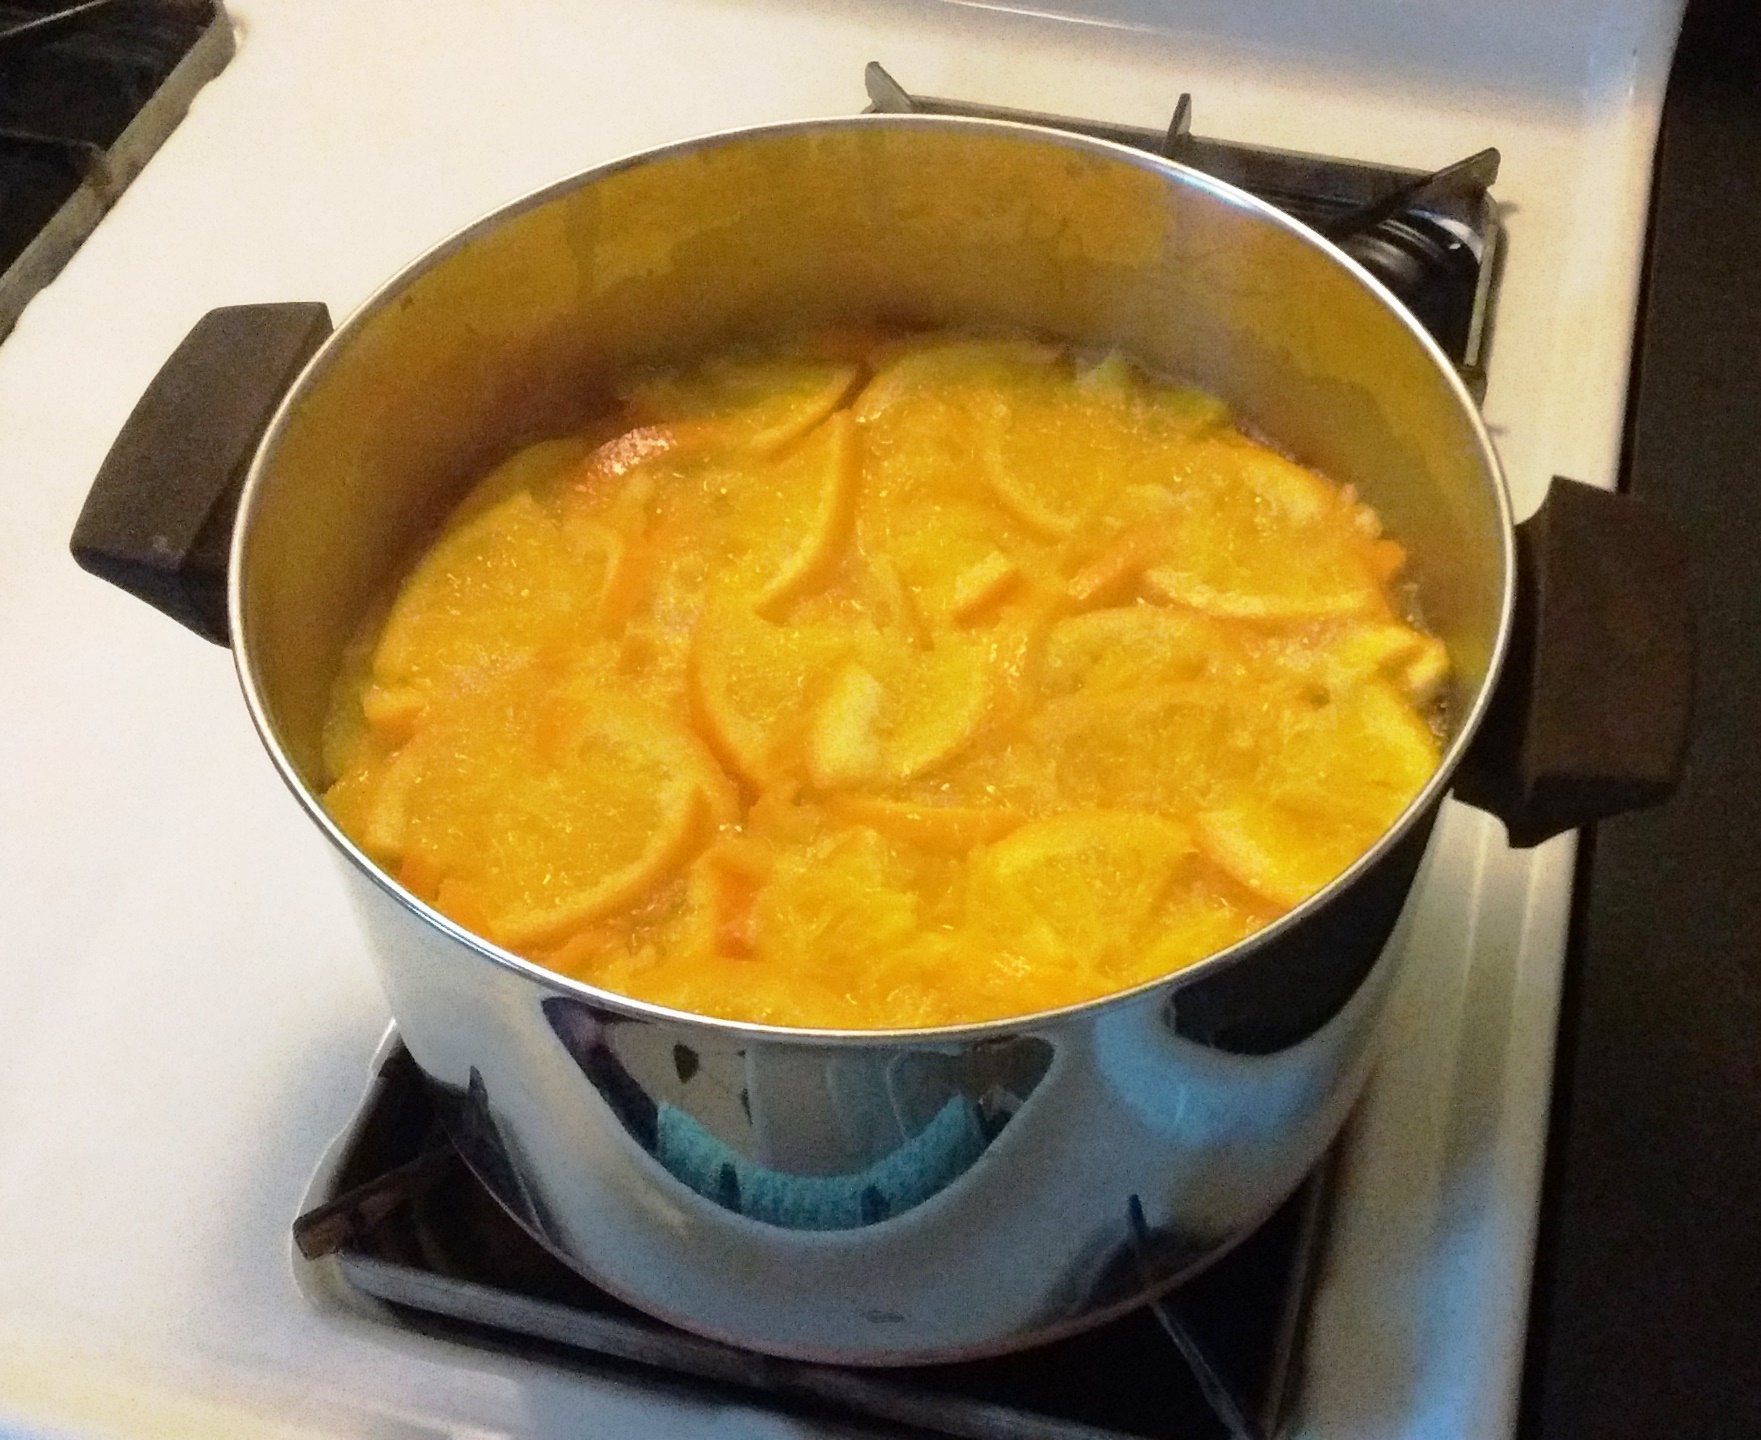
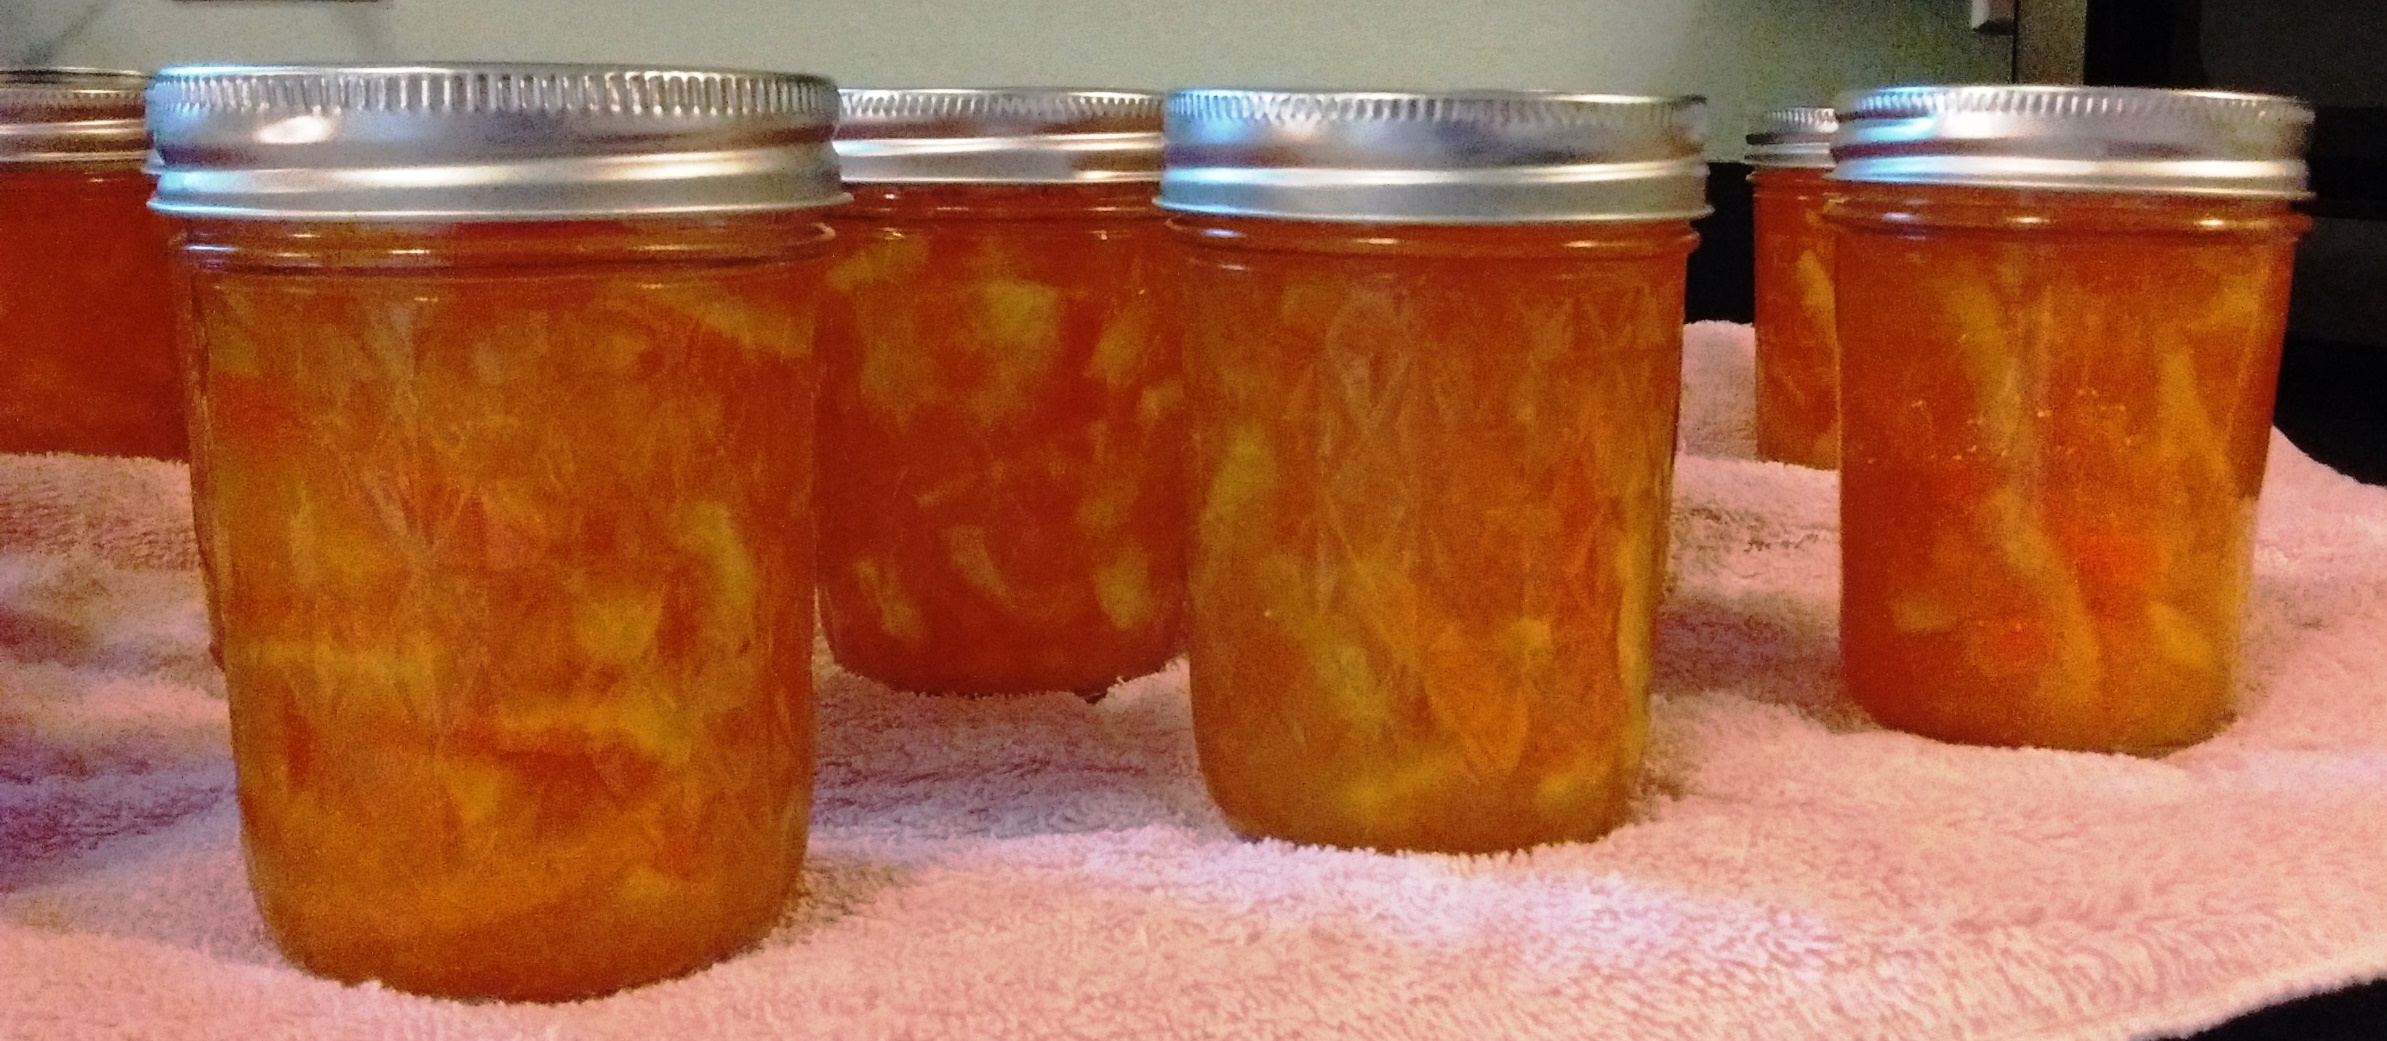
From Chapter One, I featured fried eggs and potatoes, ham and redeye gravy, buttermilk biscuits with butter and jelly, creamed peas, fried apples, and canned peaches for the breakfast celebrating my protagonist’s birth.

In Chapter Six, the first time Johnny Welles meets his Aunt Prudence, I had his stepmother, Collie, serve fried chicken, black eyed peas, fried okra, mashed potatoes, and gravy.

The menu for the meal I created for Chapter Seven, when Johnny leaves the farm with his Aunt Prudence, includes cold fried chicken (See recipe above), fresh peaches, apple pie, and lemonade.

The pork chops I served in Chapter Nine went with the buttermilk biscuits, fried eggs, and fried apples from Chapter One.  If the food item appeared twice in my novel, I only featured the recipe once.

The brisket from Chapter Twelve, when John and Claude celebrated Hanukkah with their friend, Sam Feldman, was enjoyed with latkes.

John and his girlfriend, Garland, were served roast chicken, buttermilk biscuits (See recipe above), and peach pie by Garland’s father, Hugh Griffin, in Chapter Fifteen.  Those buttermilk biscuits were obviously a favorite of mine!

But then I must have liked the latkes, too, because they reappeared in Chapter Twenty Eight when John dined with the Hannah and Reuben Wise and I featured salmon patties topped with carrot slices and horseradish, latkes (See recipe above) with applesauce and sour cream, and homemade grape juice.

The last little meal I have to mention is the brown beans and cornbread served in Chapter Twenty Nine.  I assumed most people would figure out they go together, but they’re just too delicious not to mention.

I hope this satisfies the request to group my recipes as they were featured in my novel.  I still laugh to myself when I think how I feed my characters as if entertaining good friends.  It’s probably because I grew up with parents who can cook and enjoy doing so, and a grandmother whose simple food prepared with love forms some of my best memories.

There are only a handful of chapters that do not include a single mention of food.  As for the ones that do, and aren’t included here, I hope you’ll enjoy a trip through the Edible Fiction portion of my blog discovering the recipes.

Have a Holly, Jelly Christmas

Christmas morning of 1917 was a time of excitement for Johnny Welles and his three older siblings.  In addition to celebrating the special day, a secret was brewing behind the scenes that would add to the festive holiday season and bring joy to the entire family.  In a passage leading up to the discovery of this secret, I wrote a portion for my novel, The Secrets of Dr. John Welles, that included the special treat of apple jelly on pound cake served for Christmas breakfast.  The following recipe is the one I had in mind when writing the above-mentioned scene.

Collie’s Apple Jelly

3 lbs. tart apples (¼ underripe and ¾ ripe)

3 c water

2 T lemon juice, strained

3 c white sugar

This recipe doesn’t require an outside source of pectin because it uses tart apples which are higher in pectin.  Also, the slightly underripe apples further ensure a natural source of pectin.

Sort and wash the apples.  Remove the stems and blossom ends.  Do not pare or core the apples.  Cut them into small pieces.  Add the water, cover, and bring to a boil on high heat.  Stir occasionally to prevent scorching.  Reduce the heat and simmer the mixture for 20 to 25 minutes, or until the apple pieces are soft.  Do not over boil or you’ll destroy the pectin, flavor, and color in the fruit.

Dampen a jelly bag and suspend over a clean bowl.  Ladle the cooked apples and liquid into the jelly bag and allow the juices to drip through on their own.  Pressing out the juice will result in cloudy jelly.  If a fruit press is used, pass the juice through a jelly bag to reduce cloudiness.

Pour the apple juice into a flat-bottomed pot.  Add the lemon juice and sugar.  Stir thoroughly.  Boil the mixture over high heat to eight degrees above the boiling point of water (this temperature depends on where you live in regards to sea level) or until the jelly sheets from a spoon.  Remove the jelly from the heat and quickly skim off the foam.

Immediately pour the jelly into hot, sterile jars.  Be sure to leave ¼ inch headspace.  Wipe the rims with a clean, damp paper towel.  Fit a canning lid into a ring and place on the jars of jelly.  Take care to level and tighten them properly.  Process the jars in a water bath canner.  The time required will depend on the altitude at which you live:

0 – 1000 ft. for five minutes

1001 – 6000 ft. for 10 minutes

Above 6000 ft. for 15 minutes

Remove the processed jars using canning tongs.  Allow the jars to cool on several layers of towels.  During this time, you’ll hear the lids pop indicating successful canning.  You can remove the rings for reuse once the lids pop and the jars cool.  Any lid that does not pop has not sealed properly.  These jars should be cooled and refrigerated for immediate use.  This recipe yields about four to five half-pint jars of golden sweet deliciousness.

Now it’s time for the confession portion of this post.  Thinking like a modern woman, I had Collie making the apple jelly a few days before she served it for Christmas.  In my world, one would simply go to the store for apples or pull them from the refrigerator where they waited patiently to be eaten or made into something delicious.  Refrigerators for home use weren’t invented until 1913, and I seriously doubt the Welles family would have had one by 1917.  They could have had a cellar, but I never mentioned this in the description of the house, and to do so for the sake of one scene would feel contrived.

Apples will last for six to eight weeks with refrigeration, but left on a counter, they will ripen ten times faster because enzymes are much more active at room temperature, and they will only last for a week or two.  More likely, Collie would have made the jelly during the months when apples were in season.  So while I made a small culinary mistake in my novel, fortunately I discovered it prior to publication.  As I’ve always said, the research begins with the author.  It will be easy to edit this scene by having Collie say she held back one jar to use on Christmas morning.

Doughnuts and Dilemmas

The summer of 1949 was a time of trial and error for Dr. John Welles as he moved forward in his relationship with diner owner, Bea Turner.  Unbeknownst to the doctor, a secret from Bea’s past was about to spill over into his life and drastically change the course of their association.  Already Bea had begun dealing with the misfortune headed their way, but for Dr. Welles, the decisions he made regarding the woman he loves would resurface years later in a most unwelcome way.

On the day after Bea’s bad luck returned, she tried to hurry her patrons along so she could take action to protect herself.  She offered them homemade doughnuts to take along to their jobs at the railyards, but her plan backfired, and the men stayed around drinking their coffee and eating Bea’s delicious baked goods.

The following recipe is the one I had in mind when I wrote the above-mentioned scene.  I love a simple cake doughnut unadorned by glazes, frosting, sprinkles, or any topping, but these can be enjoyed however you choose.

Bea Turner’s Homemade Doughnuts

1 c sugar (I used raw)

2 t baking powder

1 ½ t salt

½ t nutmeg

½ t cinnamon

¼ c unsalted butter, melted

1 t vanilla

1 c buttermilk

4 c flour

Peanut oil for frying

I used a stand mixer for this recipe because the dough is quite heavy and sticky.

Combine the sugar, baking powder, salt, cinnamon, and nutmeg in the bowl of the mixer.  Add the melted butter, eggs, vanilla, and buttermilk.  Mix well until all ingredients are combined.  Add one cup of flour at a time, mixing well between each addition.  The dough should be soft and sticky but firm enough to handle.

Cover the dough with plastic wrap and chill in the refrigerator for one hour.  Remove the chilled dough from the refrigerator and heat about one inch of peanut oil to 360° in a large skillet.  (I used my electric skillet to maintain a constant heat, but you can do this in cast iron with a candy thermometer.)

Work with half the dough and roll it out on a floured surface to about half-inch thickness.  Cut out doughnuts using a doughnut cutter.  (You may also use a biscuit cutter, but you’ll need to improvise for cutting the hole.  A cap from a two-liter pop bottle will do in a pinch.)

Gently place the doughnuts in batches in the hot oil using a slotted spoon or bamboo-handled skimmer, sometimes called a Chinese strainer.  Fry for two to three minutes total turning them over a couple of times as they begin to puff.  When the doughnuts are golden brown, remove them from the hot oil with a slotted spoon and place them on a paper towel or paper bag covered cooling rack.

Warm doughnuts can be tossed in cinnamon sugar, glazed, iced with melted chocolate, and topped with sprinkles.

Enjoy!

It’s What Liv Ordered

In May of 1951, diner owner, Bea Turner, was asked to make a birthday cake for Toby Bruce Robishaw who was turning one.  Toby’s mother, Liv, was an extravagant woman who loved to make a show of everything she did.  Her son’s first birthday party was no exception.

The people Liv invited to Toby’s party were simple folk living in the hills of West Virginia.  They had simple tastes and probably expected a simple dessert such as Crazy Cake.  However, Liv used the occasion of her son’s birthday to show off yet again.  The cake she came up with is lovely, but it was completely lost on the birthday guests.

The following recipe is the one I had in mind for the above-mentioned scene taking place in my novel, The Secrets of Dr. John Welles.  By tweaking portions of other recipes, I created a cake suitable for the splashy tastes of Liv Barrette Robishaw.

Now don’t get me wrong; the cake is delicious.  It’s not what one would serve at a child’s party.  Here’s a passage from my novel describing exactly what Liv requested of Bea:

Three, double-layer cakes were divided by pillars with plastic circus animals placed in the space between.  Red and blue icing crisscrossed the edges of the cake in every direction.  A handful of colorful flags exploded out of the top layer.  Every inch of the cake not already taken up with decoration had a piece of candy pressed into the icing like a gingerbread house.

Liv’s outlandish request is what prompted Bea to say, “It’s what Liv ordered.”  Bea’s statement was offered as an explanation and apology to the townsfolk who understood completely.

The quantities listed below will make one layer of the cake I described above.

Hazelnut Cake

12 oz. hazelnuts

2 t baking powder

6 egg yolks

5/8 c white sugar

6 egg whites

Toast the hazelnuts in a 350° oven for 10–15 minutes or until lightly golden in color.  Cool completely.  Remove the skins from the toasted nuts by placing in a tea towel and briskly rubbing them together or place them in a colander and swirl them around to remove the skins.  Grind the hazelnuts until very fine.  Add baking powder and set aside.

Preheat the oven to 325°.  Thoroughly grease and flour a 9-inch springform pan.

In a large mixing bowl, use a hand-held electric mixer to combine the egg yolks with the sugar until pale yellow in color.  Beat in the ground hazelnuts.  This mixture will be extremely heavy and sticky.

Wash your beaters to remove any traces of fats.  In a separate bowl, beat room temperature egg whites until stiff peaks form.  Carefully whisk 1/3 of the egg whites into the yolk mixture to lighten the batter.  Fold in another 1/3 of the egg whites taking care not to delate them.  Fold in the remaining 1/3 of the egg whites until no streaks of batter remain.

Gently pour into the prepared 9-inch springform pan.  Bake in a preheated oven for 60 minutes or until the top of the cake springs back when lightly tapped.  Cool completely on wire rack.

Cinnamon Crème Filling

1 c heavy cream, chilled

1 c powdered sugar

1 ½ t ground cinnamon

1 t vanilla

Chill a metal bowl and the beaters of a hand-held mixer in the freezer for ten minutes.  Pour the heavy cream into the chilled metal bowl and beat on high speed with a hand mixer until the cream is frothy.  Slowly add the powdered sugar, cinnamon, and vanilla.  Continue beating until stiff peaks form.

Place the bowl of cinnamon crème filling in the refrigerator until needed or use immediately.

Whipped Buttercream Frosting

3 c powdered sugar

2 sticks unsalted butter, at room temperature

3 T heavy cream

2 t vanilla

Beat the butter, heavy cream, vanilla, and one cup of powdered sugar with a hand mixer until they are completely combined.  Add the remaining two cups of powdered sugar one cup at a time.  Blend well after each addition.  The lighter weight of this buttercream frosting is perfect for the delicate hazelnut cake.

You can use this frosting immediately or chill for later use.

Assembling the Cake

Once the cake has cooled completely, cut it in half horizontally.  Place the bottom half (cut side up) on a cake stand  and spread the Cinnamon Crème Filling generously over the top with a spatula or knife to within ¼ inch of the cake edge.  Place the top layer of cake (cut side down) over the filling, taking care to position it correctly.

Using a knife or spatula, ice the top of the cake with the Whipped Buttercream Frosting.  Do not drag the frosting too hard across the cake.  Level the top with icing and proceed to ice the sides until they are completely covered.  Wipe any icing smears from the edge of the cake stand with a clean, damp cloth.  Chill for at least an hour before serving.

Enjoy!

SIDE NOTE:  If you’ve never folded egg whites into batter, I strongly suggest you watch the video I’ve provided.  It’s a delicate process, but don’t be daunted by it.  Regardless of how you whip your egg whites, it’s the folding process the chef demonstrates that is of the utmost importance.

The Art of Folding

Plum Lucky

By spring of 1920, twelve year-old Johnny Welles had made up his mind to leave the only home he’d ever known.  As hard as it was to say goodbye to his beloved stepmother, Collie, Johnny was determined to escape the tragedies that marred his childhood.

His three older siblings, Stanley, James, and Eunice, supported Johnny in his decision even though it broke their hearts to see him go.  His Aunt Prudence, who would take over Johnny’s care, was thrilled by his choice to reside with her in Baltimore and even more so with his pronouncement that he wanted to become a doctor.

In the months after his youthful declaration, Johnny spent all of his free time with Doctor and Mrs. Hager.  The Hagers, German immigrants with no children of their own, welcomed Johnny when they discovered his passion for all things medical.  The Hagers, aware of and sensitive to Johnny’s heartbreaks, couldn’t resist the opportunity to share their medical knowledge with the young boy.

Whenever possible, Doc and Mrs. Hager included Johnny in consultations and examinations.  Between patients, the three would pore over medical journals and Mrs. Hager’s pflaumenkuchen (plum cake).  The following recipe is the one I had in mind when I wrote the scene above.  This rich, delicious cake is quick and easy to make.  The beauty of this recipe is that you can substitute any stone fruit for the plums.  Consider peaches, nectarines, or cherries as an alternative.

Little Italian plums are my favorite when making pflaumenkuchen with black plums as a close second.  Italian plums aren’t available in my area until July, so I’ve presented this cake with black plums which are also quite appealing.  If using Italian plums, cut them in half and pit them.  The same goes for cherries.  For large stone fruits, cut them in half, pit them, and cut into slices.

The Gibson household enjoys this cake still slightly warm and served with vanilla ice cream or whipped cream.

Pflaumenkuchen

1 c sugar (I used raw)

½ unsalted butter

2 eggs

1 t vanilla

1 c flour

1 t baking powder

Plums, pitted and halved

2 T sugar (I used raw)

1 t cinnamon

Powdered sugar (optional)

Preheat your oven to 350°.  Grease an 8 X 8 glass baking dish.

Cream the sugar and butter.  Add the eggs and vanilla, and beat well.  Add the flour and baking powder, and mix thoroughly.  The batter with be thick like soft cookie dough.

Spread the batter into the baking dish and level it with a knife or spatula.  Place the halved plums (if using Italian) cut side down in even rows across the surface.  The same applies to cherries.  All other stone fruits should be placed in single-layer rows across the surface.

Combine the two tablespoons of sugar and cinnamon.  Sprinkle the mixture across the top of the cake and plums.  Bake for 50 minutes or until a knife inserted comes out clean.

When cooled, sift powdered sugar over the cake if desired.

Enjoy!

Wholesome Homecoming

August of 1945 should have been a time of celebration for Dr. John Welles. The Second World War was over in Europe and swiftly coming to an end in the Pacific. However, John’s homecoming wasn’t what it appeared to be, and the secret surrounding the circumstances were known only to him and his Aunt Prudence. While she was instrumental in helping her nephew make the transition from his experiences as an Army doctor back to civilian life, there was one painful secret of which even Prudence was not aware.

John’s family was seated in the kitchen eating when he arrived. He stood outside the row house and watched from a distance as they ate a simple breakfast that included oatmeal. I chose oatmeal because it is humble and solid just like the Welleses, and this basic breakfast food was representational of the support John’s family would provide during his first, difficult days home.

Long before experts started touting oats for the health benefits, oats have been used as a food source for people and animals. According to one source, only five percent of the oats grown in America are used for human consumption as breakfast food or oat flour. They are believed to be Asiatic in origin and appeared on the scene later than wheat with the earliest uses being for medicinal purposes. Then there is the debate on steel cut versus rolled oats, the explanation on the different types of oats, and the history on the most famous brand I know, Quaker.

The preparation of oats appears on the container, so I’ll focus on the toppings. This is where one has endless possibilities to explore. A favorite at the Gibson household is Zante currents, maple syrup, toasted, chopped pecans, a pat of butter, and cream that has been warmed. Some people keep it as simple as a pinch of salt while others go crazy with chocolate chips and a dollop of peanut butter.

When cooking oats, opt for water over milk as cooking in milk will make for stickier, thicker oatmeal. Save the dairy for a topping. Spices can be added during the cooking process and should be ground; picking out whole cloves and cinnamon sticks afterward is unpleasant. Don’t forget to add a pinch of salt to the water because that’s where seasoning begins.

Bringing the oats and water to a boil together makes for a creamy cereal whereas bringing the water to a boil and then adding the oats results in a chewier meal. I wouldn’t suggest trying this with steel cuts, however, as they are already springy in texture to begin with. Serve oatmeal in a deep bowl to keep it smooth and hot. A shallow dish will cool your breakfast treat too quickly, and you’ll end up with a gluey, unpalatable mess.

If you’ve never enjoyed oats, don’t curl your lip, raise an eyebrow, and pass up oats and oatmeal. They are delicious beyond their nutritional value and neutral appearance. Also, consider them for lunch or dinner, and if you really want to impress, offer them as a side dish to dinner guests with the inclusion of caramelized shallots and uncured turkey bacon or as a dessert made with saffron and cardamom.

“Oats.” Oats. Purdue University – Center for New Crops & Plants Products, Feb. 1999. Web. 26 Mar. 2017.

Walsh, Danielle, and Kimberley Hasselbrink. “9 Ways to Totally Screw Up Your Oatmeal.” Bon Appetit. Bon Appétit, 23 Jan. 2014. Web. 26 Mar. 2017.

**Read Easy Peasy to learn how to quickly generate citations.

Dark, Rich Secrets

Twice in my novel, The Secrets of Dr. John Welles, I featured chocolate pie. The first time was in December of 1925 when John and his Aunt Prudence discussed the painful details surrounding his father’s death. Prudence kept trying to turn the conversation away from the truth of the situation even going so far as to use the pie as a diversion. The delicious dessert popped up again in a scene between John and his best friend’s wife, Babby, in June of 1964, as they worked through the awkwardness of not seeing each other for sixteen years.

As many of my followers already know, my food choices actually play a peripheral roll in my writing. In this case, chocolate pie is dark, not unlike the secrets about to be revealed in the above-mentioned scenes. In both cases, John’s past was dredged up for him to face yet again, and someone would try to smooth over the situation. Keep in mind that chocolate pie is exceptionally smooth. It is also rich and sweet which matched the outcome for John in his conversation with his Aunt Prudence as a young man and again with Babby as an adult.

The recipe I had in mind for the chocolate pie is simple yet elegant. It is a favorite at church bakeoffs and picnics as well as a top off to any family dinner. I hope you will enjoy it as much as my characters did.

Lucia’s Chocolate Pie

Single Crust:

1 c flour

¼ t salt

1 stick unsalted butter, cold and diced into ¼-inch pieces

½ c cold water with an ice cube

To make a bottom crust, combine the flour, salt, and butter. Work with your hands until the flour and butter combine to make pea-sized pieces. Add the water a tablespoon at a time and work through until you can form a ball. Wrap the dough ball in plastic wrap and chill for twenty minutes in the refrigerator.

Preheat oven to 425°. Roll the dough on a floured surface to fit a nine-inch pie plate. Crimp the edges and prick the bottom and sides of the shell with a fork. Line the pie shell with aluminum foil or parchment paper and fill with pie weights or baking beans. Bake at 425° for 10 minutes, remove the baking weights and continue cooking for 10 minute in 5 minute increments or until the crust is golden brown. Remove from the oven and place on a cooling rack.

Pie Filling:

½ c cocoa

¼ c cornstarch

3 egg yolks, beaten

1½ c sugar (I used raw)

¼ t salt

2 c half and half

1 t vanilla

3 T unsalted butter

Sift the cocoa, cornstarch, and salt directly into a saucepan. Add the sugar** and half and half, and stir carefully to mix. Bring to a boil over a medium high heat, stirring constantly. Boil for one minute. Remove from the heat and spoon a small amount of the mixture into the egg yolks to warm them. Pour the warmed yolks in a thin stream into the saucepan taking care to stir them in thoroughly.

Return the pan to the heat and boil for two more minutes. Remove from the heat and add the butter and vanilla. Pour the mixture into the baked pie shell and allow it to cool for a few minutes before topping with a piece of waxed paper to prevent a skin from forming. Bring the pie to room temperature before placing in the refrigerator to cool completely. Whipped cream is the perfect topping for a chilled pie.

**If using granulated white sugar, sift it as well. The large crystals of raw sugar will not pass through a sifter. Simply break up any lumps before adding to the mixture.

~OR~

You can top it with meringue using the following recipe. Make the meringue while the pie is cooling on the countertop. Once topped with meringue set in the oven, you can continue cooling in the refrigerator.

Meringue:

4 egg whites

6 T sugar (I used granulated white as the raw is too coarse for this step)

Pinch of cream of tartar

Whip the egg whites on a high speed until foamy. Gradually add the sugar and a pinch of cream of tartar, and continue whipping until stiff peaks form. Spread the meringue over the pie and seal at the edges of the crust. Set the meringue in a 425° oven for eight minutes or until it is golden brown. Cool the pie on a wire rack until you can handle the edges of the pie plate and serve warm, or chill the pie in the refrigerator for a couple hours and serve cold.

Tips for success:

Chill the beaters and bowl in which you will beat the egg whites for meringue

That pinch of cream of tartar is what will keep your egg whites from breaking down and becoming watery.

Enjoy!

Don’t Get Crabby With Me

dont-get-crabby-with-meI’m very excited to present today’s post for Edible Fiction in regards to my novel, The Secrets of Dr. John Welles. Although I won’t be making this recipe because the main ingredient has yet to come in season, I couldn’t resist sharing. My research on blue crabs yielded a wealth of knowledge and an enthusiasm for the dish, so I decided to post for two reasons: 1) You’ll want to be prepared for the blue crab season, and 2) Depending on where you live and/or your finances, you may want to turn this into a vacation.

In June of 1925, John Welles and his Aunt Prudence were planning his high school graduation party. They did so over a dinner of blue crab. When I initially wrote this scene, I assumed because they were on the coast, Maryland specifically, they would have eaten crab legs, and I stated as much. Please forgive my inlander ignorance. I corrected my mistake because I am a stickler for details in writing (Who Is In Your Details?). Research on this subject prompted a quick edit from crab legs to blue crabs and a visit to my local fish market, Klein’s Seafood.

I visited Klein’s to see what a semi-landlocked gal like myself could do.  I say semi because my state borders one of the Great Lakes, but alas, there are no blue crabs coming from this water source.  Fear not, fellow Ohioans, Klein’s receives blue crabs from the coast.  Seafood shops can have the crabs shipped live, but as one shop employee explained, many die during the trip and no one wants to buy the dead crabs.  So, Klein’s orders their blue crabs already cooked and ready to go.  Since I couldn’t purchase blue crabs to prepare for you, I decided to offer the next best thing.  I also dined on a white perch sandwich with lettuce and tartar sauce and six of the tastiest hushpuppies I’ve ever had, but I digress.

I could write an essay on blue crabs and the preparation thereof based on the articles I researched, but it would be easier and more thorough to direct you there. Don’t think me lazy; I simply don’t want to miss a single important detail regarding blue crabs. Once you read the articles, you’ll see why I suggested a vacation to Maryland. Not only is Maryland a wonderful place to visit for the historical aspect, the seafood restaurants featuring blue crabs and other produce from the ocean are worthy of a visit, too.

dont-get-crabby-with-me-2The first article, Maryland Crabs: A Guide to the East Coast’s Essential Summer Feast by Eater DC contributor Jamie Liu from June 5, 2015, provides an in-depth explanation on blue crabs from the how to the where of the blue crab season. I found this one to be easily understood and good for a blue crab novice such as myself. The restaurants mentioned were a combination of old and new establishments and ownership, but all had history with the Maryland crabbing industry.

And because I’m a conscientious writer against the overharvesting of natural resources as well as someone who loves the science behind anything we eat, Brenda and Glenn Davis’s article on the Life History & Management of Blue Crabs is most beneficial.

Also from Eater is this post, Eight Maryland Crab Houses Worth the Drive, by Tim Ebner from August 19, 2016. Complete with restaurant names including a brief description and address, directions, and a map, you can’t go wrong with this tidbit of information for planning your tour of crab houses whether you’re a novice or expert in the knowledge and eating of blue crabs.

Perhaps you’re thinking this is overkill just for one mention of blue crabs in a novel. Maybe, but I’d rather be accurate with my information than make a glaring error. Besides, if it sends people to Maryland for a visit, or even more to my liking, encourages them to buy my novel, so much the better.

Enjoy!


Getting Out of a Jam With Marmalade

sweet-solution-4The character of Lucia in my novel, The Secrets of Dr. John Welles, started out as one of peripheral importance. I created her simply to serve in the role of head cook to John’s Aunt Prudence, but she evolved into someone much more important. Just short of handling finances, it was understood that Lucia ran the household. She also ran Prudence with a style somewhere between a tough love guidance counselor and a wise, older mentor. Lucia also came to John’s rescue in the years following his brief service during World War II. John was unable to deal with the horrors he witnessed and most specifically for the one he caused that he kept secret from those he loved.

One day over a breakfast of popovers and orange marmalade, Lucia suggested that John go on a journey taking him away from his family so he could deal with the ghosts haunting him. John’s Aunt Prudence was heartbroken at the suggestion, but Lucia knew John needed time away to heal his mind and body. Besides, she would still be in Baltimore tending Prudence more as a close friend than as an employee. Prudence would only admit if pressed to say, but her relationship with her feisty cook was exactly how she liked it.

The following recipe is the one I had in mind when I wrote the above-mentioned scene. There are some nice orange marmalades on the market in upscale food shops, but nothing quite compares to the flavor of homemade orange marmalade. Not only will your house smell wonderful while it’s cooking, the taste of homemade orange marmalade on toast, vanilla ice cream, or whole grain pancakes defies any description of deliciousness.

Lucia’s Orange Marmalade

6 large oranges with thin skin

1 lemon

6 c water

8 ¼ c of granulated sugar

Approximately 14 – 6 oz. canning jars, lids, rings

Water bath canner with canning rack

Wash the oranges and lemon using a mushroom brush or another type of soft, clean brush. Cut the oranges into 1/8 inch slices. Remove any seeds. Cut the stacked slices of orange into quarters. Trim any thick pieces of rind into slivers to use. Place the oranges in a large cooking pot. Zest the lemon and juice it. Add the zest and juice to the oranges in the pot along with the water. Bring to a boil over a high heat. Reduce the heat and maintain a bubbling simmer. Stir frequently and cook for forty minutes until the rinds of the oranges are tender enough to cut with a spoon.

sweet-solution-3While the orange/lemon mixture cooks, bring a large pot of water to a boil and place the canning jars in the water. Sterilize the jars by boiling for ten minutes. Turn off the heat and add the lids and rings. Let everything sit until the marmalade is ready. You may need to do this in two separate pots due to the quantity of jars.

After the orange/lemon mixture has cooked for forty minutes, add the sugar and return to a full boil. Stir frequently so the sugar doesn’t burn and the mixture doesn’t stick to the bottom of the pot. Boil until the mixture reaches 223° on a candy thermometer. This process should take at least twenty minutes, but depending on your stove and/or cooking pot of choice, it may take longer. Keep a close eye on your thermometer and watch as the mixture darkens, turns glossy, and thickens. Adjust the heat if needed to keep it from boiling over.

To test the readiness of the marmalade, place a saucer in the freezer to chill. A small dollop of the marmalade placed on the chilled plate and allowed to cool should gel and move slightly. Anything runnier and the marmalade isn’t ready. Keep cooking, and watch your thermometer.

When the marmalade is ready, remove the jars from the water and drain on a clean towel. Carefully ladle the marmalade into the jars to just below the threads of the jar. Using a ladle and slotted spoon ensures that you don’t end up with too much peel or too much liquid for the jars at the end. Keep the juice to rind mixture balanced in each jar. Wipe the rims and threads of the jars with a clean, damp cloth and top each with a lid. Add a ring and tighten securely. You may use fewer jars than the recipe called for, but I suggest having fourteen ready just in case.

sweet-solution-2

Cooling Jars of Marmalade

Bring water to a boil in a water bath canner (approximately half full). Using the canning rack, add the jars of marmalade to the boiling water. Add additional hot water to the canner if needed to cover the jars at least one inch. Boil for ten minutes. Carefully remove the rack of jars and set on a clean towel in a cool, dry place to come to room temperature. You should begin to hear the lids pop indicating the jars of marmalade are sealing properly. Do not move for 24 hours. Refrigerate the marmalade once a jar has been opened. Unopened marmalade will last for up to six months.

Enjoy!

sweet-solution

Javaaaah!

Coffee features quite often in my novel, The Secrets of Dr. John Welles. Whether my characters consumed it with dessert, dinner, or by itself, coffee plays an important role in the scenes as much as the food I’ve chosen for them to eat. Rather than bore you with the entire history of coffee or mention trivia such as how many cups are consumed in the world a day, I’ll focus on how coffee was prepared during the years my novel takes place.

By the time my novel opens in 1907, one of the simplest methods of brewing coffee involved placing grounds and water in a heat-proof container and bringing it to a boil over a heat source. It was that inelegant sometimes. Most of the containers were actually metal pots with a handle and spout intended for coffee, however, brewing coffee in a cooking pot wasn’t unheard of.

javaaaah2I imagine Johnny’s stepmother, Collie, might have brewed coffee in a pot without a filter, heated on a wood-burning or coal stove. I envision it looking much like the speckleware version pictured to the right. Careful pouring ensured that most of the grounds stayed in the bottom of the pot. Another name for this simple process is cowboy coffee. Riding the plains and herding animals didn’t lend much time for the more sophisticated methods of brewing, and in Collie’s case, neither did running a farm.

Perhaps Collie was lucky enough to own a percolator. She still would have heated it on the stove because electricity wouldn’t have been available as far out as the Welleses lived on their farm. The advantage to the percolator would have been a separation of the spent grounds from the final product, making a much more palatable beverage.

Percolating coffee pots consist of a chamber at the bottom with a vertical tube leading from the lower chamber to the top of the pot. Resting on the vertical tube is another chamber with a perforated bottom. This is where the ground coffee is placed. The water level should not touch the bottom of the coffee chamber. There was also a lid with a clear knob.

javaaaahThe heat source beneath the percolator heats the water in the lower chamber. Heated water starts to boil, and the boiling makes the water rise up the tube and spill over into the coffee chamber. The heated water seeps through the grounds, out through the perforations at the bottom, and back into the water chamber. This process is repeated until the desired strength of brew is achieved. Those using a percolator would check the clear knob on the lid to see if the brew has reached the right color and strength.

One source credits James Nason of Massachusetts with patenting a percolator design in 1865. Another says on August 16, 1889, Hanson Goodrich, a farmer from Illinois, received his patent for the percolator. Still another gives American-born, British physicist Count Rumford, AKA Sir Benjamin Thompson, the acclaim for the invention of the percolator somewhere between 1810–1814. Regardless of who invented or patented it first, earlier models used glass construction, but percolators made from the 1930s on were made of metal, mostly aluminum and copper.

javaaaa3Only John, his Aunt Prudence, and some of the wealthier characters would have had access to restaurants that served espresso, the result of making coffee with steam pressure, or friends who owned a French press, a pot that brews coffee then separates the final product from the grounds by use of a plunger. The classiest method the others might have encountered would be filter drip brewing invented in 1908 by German housewife, Melitta Benz, in an effort to eliminate the bitter taste produced by boiling loose coffee grounds

After experimenting with various types of filtration, Melitta Benz ended up using blotting papers from her son’s exercise book. The ensuing result was met with enthusiasm, and she patented her invention, started a company, and hired her husband and two sons. Melitta coffee filters and pots are still around today.

So the next time you enjoy a cup of coffee from your favorite establishment, whether it’s a simple cup of joe or a fancy latte, keep in mind coffee’s humble beginnings and that, as of this post, it’s still the world’s favorite hot beverage.

%d bloggers like this: