Winner, Winner, Chicken Dinner

Winner, Winner Chicken Dinner 2Hugh Griffin is on the cusp of a secret that will change the path of John Welles’s life forever. The unspoken shared knowledge exists between Hugh and his daughter, Garland, who John loves dearly. The once competitive pair has become quite close although for different reasons. Their relationship reaches its pinnacle in the summer of 1929 when she invites him to her home to visit her father, Hugh.

The retired Lutheran pastor welcomes his daughter and her boyfriend with abundant graciousness. Hugh is the type of man who lives a simple life with excellence. His cooking is homey, delicious, and prepared with love. For the special meal, he takes a little extra time with the otherwise ordinary dish of roasted chicken.

The following recipe is the one I had in mind for Hugh to prepare when John and Garland visited. The extra steps of spatchcocking and marinating the chicken are simple and go a long way to making the humble roast chicken juicy and tender. Besides, half the fun of spatchcocking a chicken is saying the word spatchcock. While I could describe this process to you, it’s much simpler to direct you to a website on Spatchcocking a Chicken. Once you’ve spatchcocked your chicken, proceed with the following recipe.

1 4-pound chicken, spatchcocked

Marinade:

2 c buttermilk

¼ c plus 2 T olive oil

4 cloves garlic, pressed

1 T ground peppercorns (I used quad-colored peppercorns)

1 T sea salt

2 T rosemary

1 T honey

Mix the buttermilk, ¼ c olive oil, garlic, pepper, sea salt, rosemary, and honey in a bowl. Whisk thoroughly. Pour the mixture over the spatchcocked chicken in a baking dish to be covered with plastic wrap or place the marinade and chicken in a freezer bag and seal tightly. Refrigerate overnight or up to two days.

Preheat the oven to 400° F. Remove the chicken from the marinade and place on a rack so the excess can drip off. Prepare the seasonings mixture.

Seasonings Mixture:

6 T unsalted butter, cold and cut into six squares
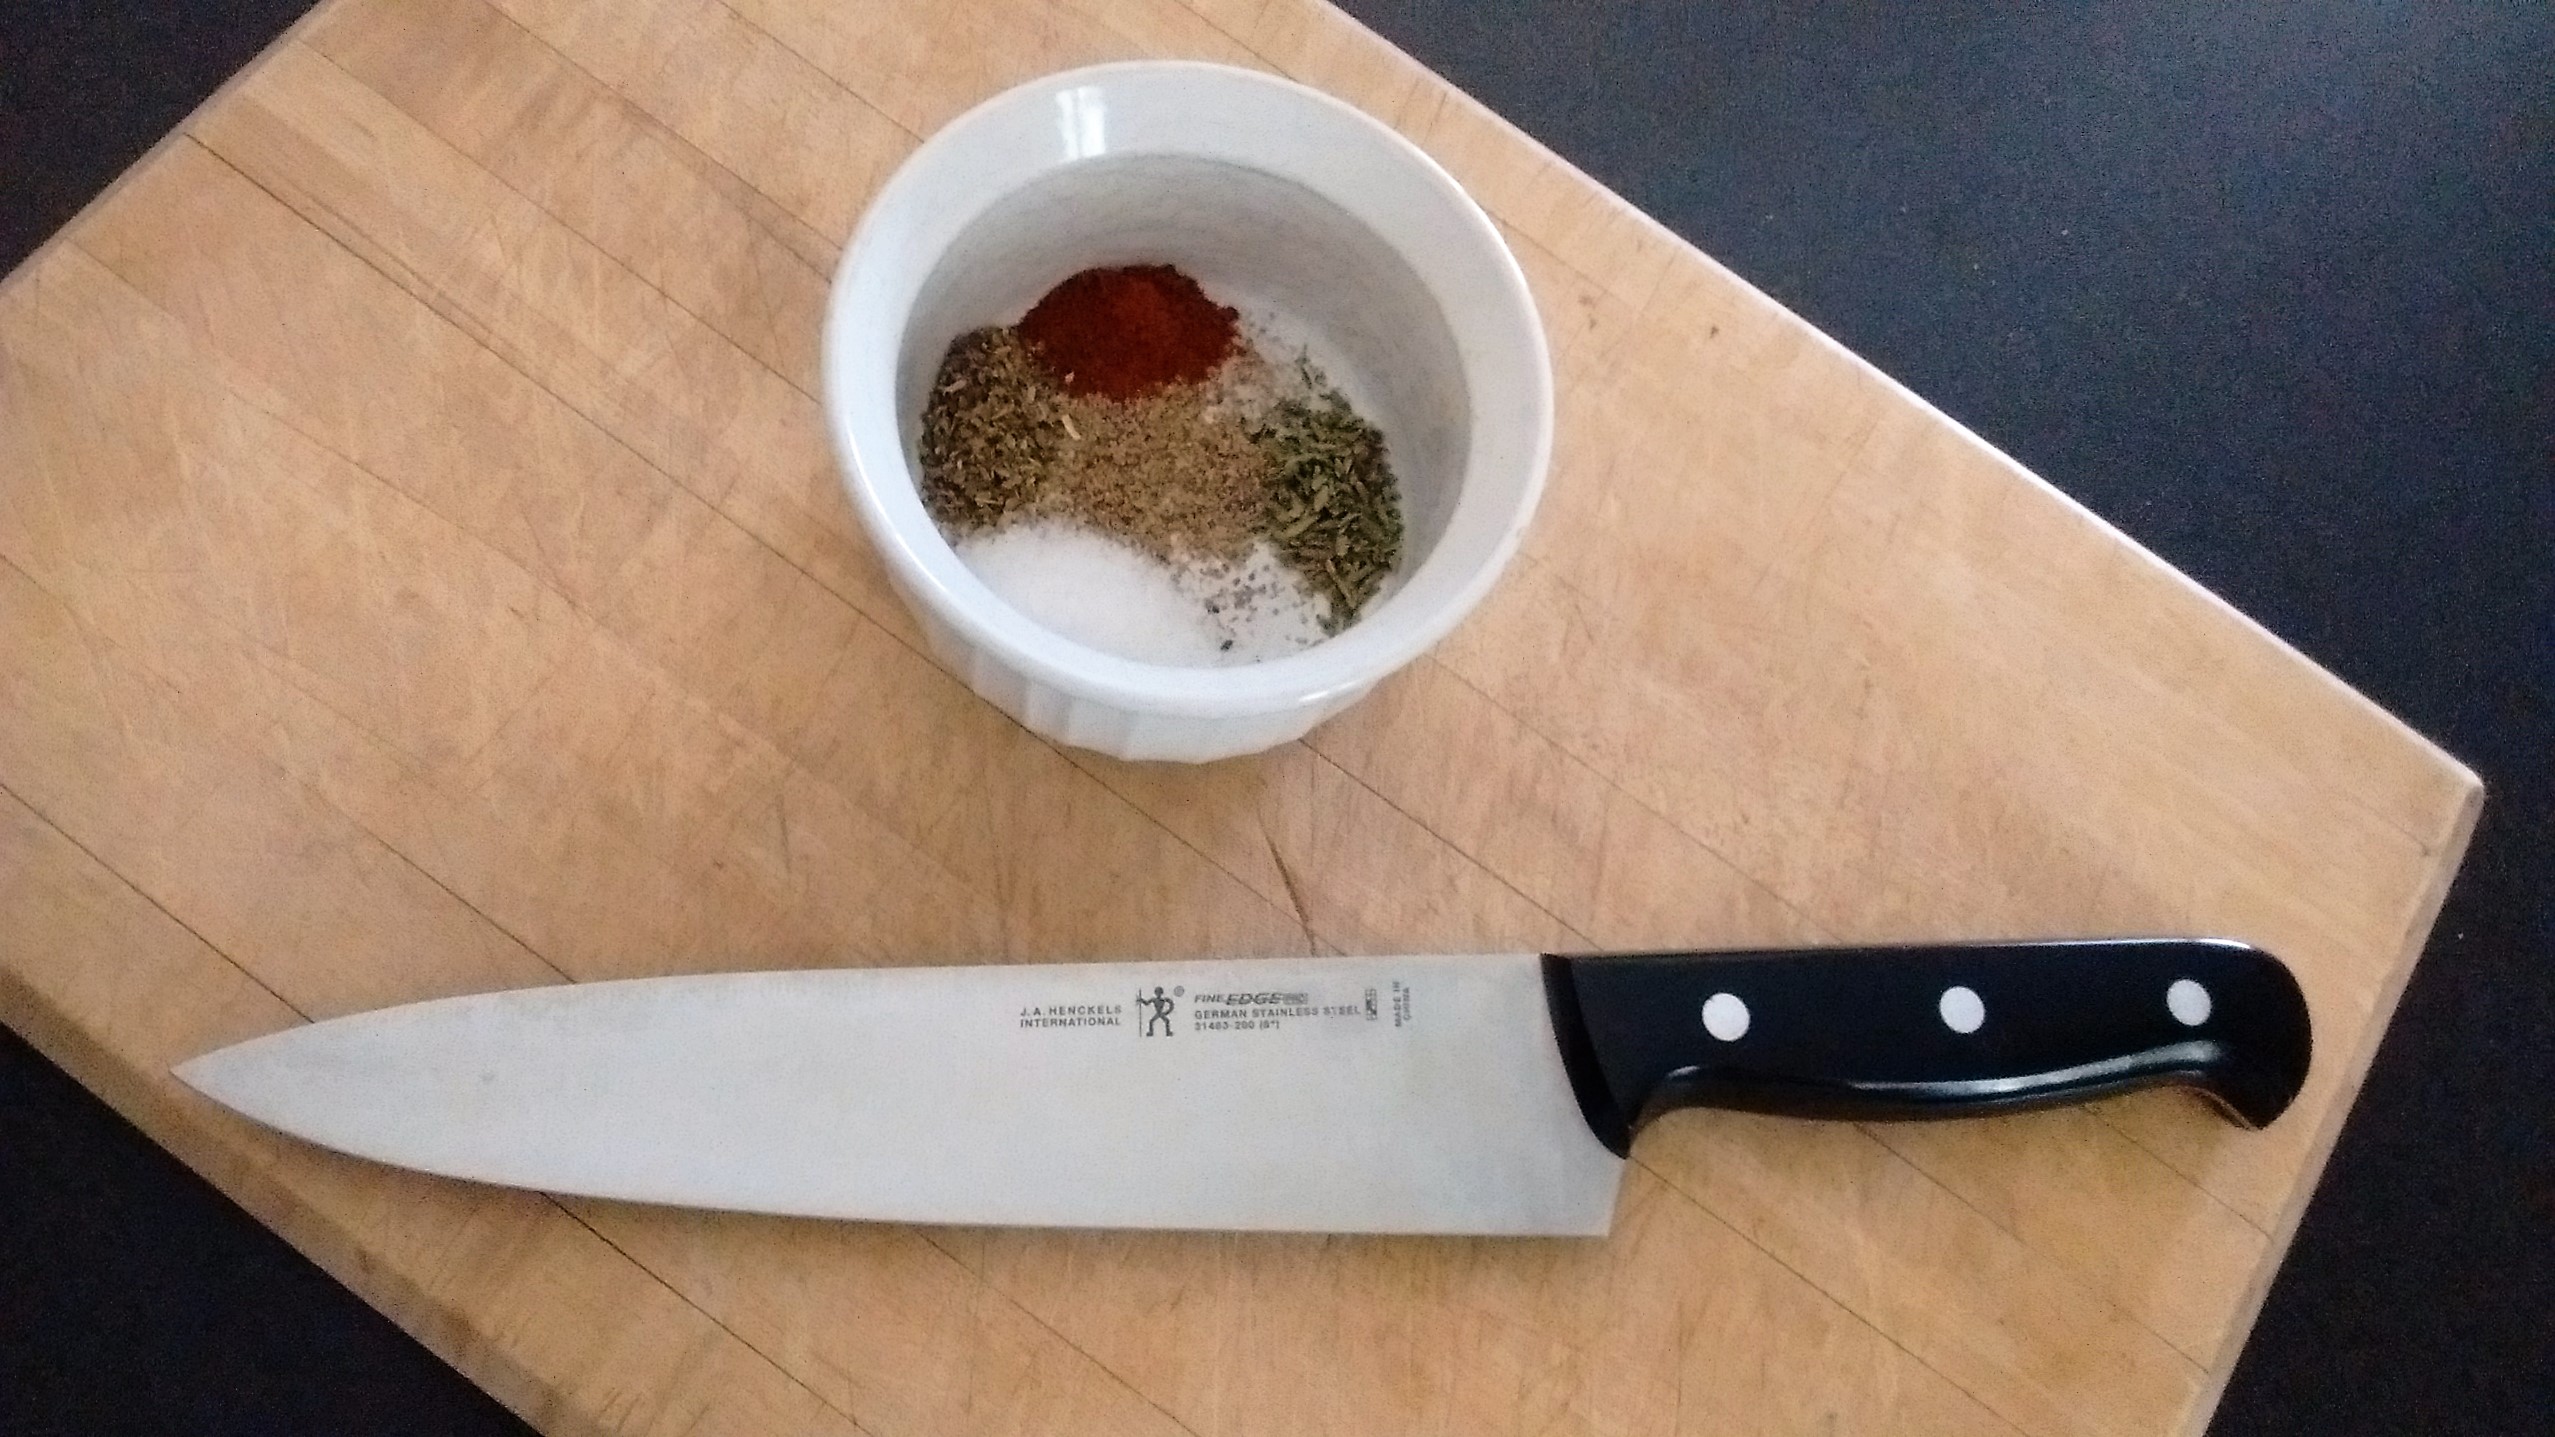
Winner, Winner Chicken Dinner 1

1 t sea salt

¼ t oregano

¼ t thyme

¼ t paprika

¼ t ground peppercorns (Again, I used the quad-colored variety)

Combine the spices and salt. Dip one side of the cold squares of butter in the seasoning mixture and shove four beneath the skin across the breast of the chicken and one each beneath the skin over the thigh/drumstick area. Drizzle the chicken with remaining 2 T olive oil and sprinkle any remaining seasoning mixture across the skin of the chicken.

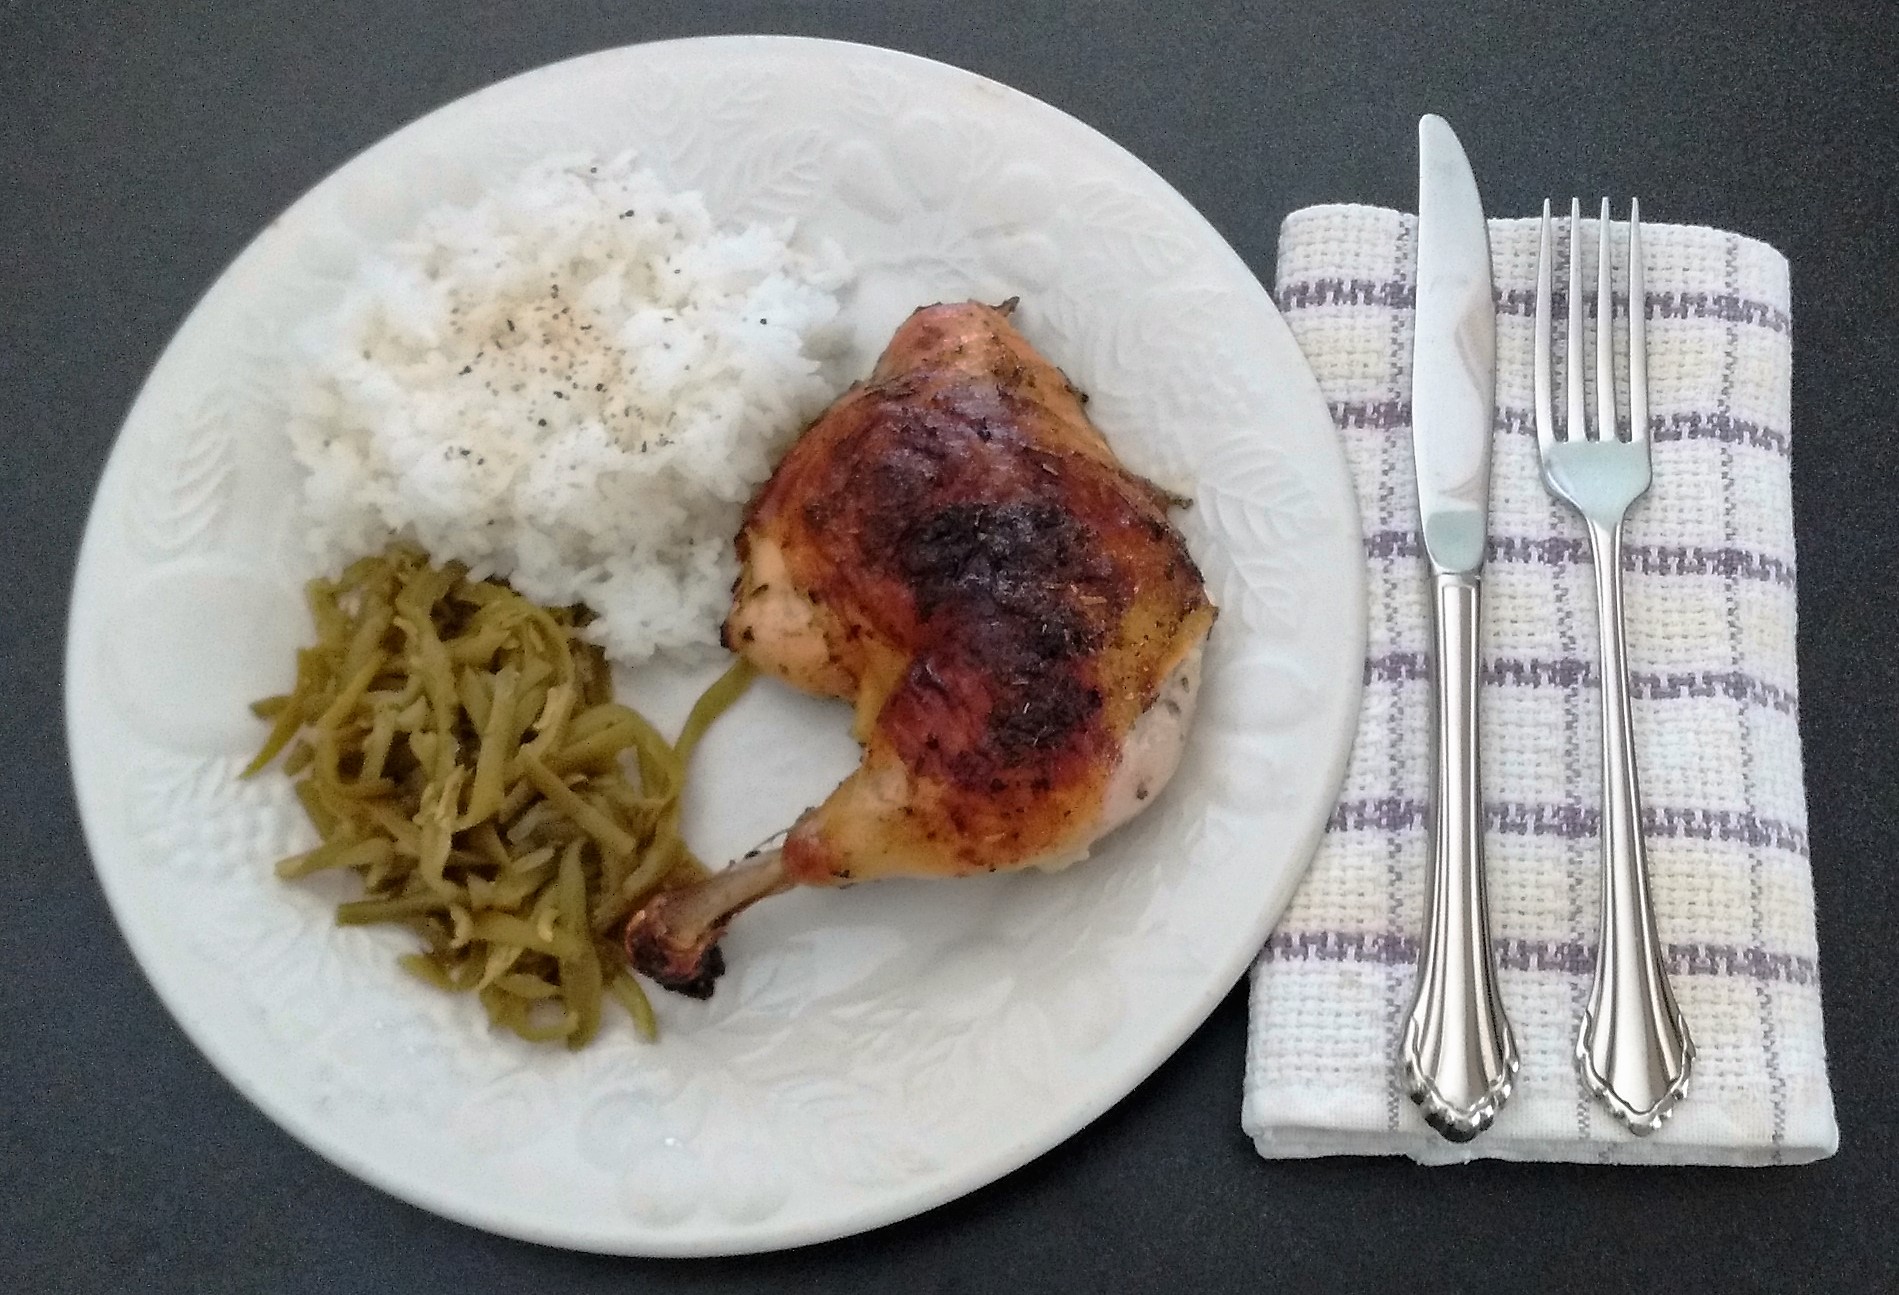
Place the chicken breast side up in a roasting pan or baking dish. Tuck the wing tips beneath the chicken. Roast for 45 minutes then reduce heat to 325° F. Baste the chicken and continue roasting until well browned and until juices run clear when chicken is pierced where leg joins thigh, about another 20 minutes.  Baste again when done roasting.

Place chicken on a carving board and allow it to rest for 10 minutes before cutting into serving pieces. Place a portion on each of four plates, and drizzle each serving with pan juices.

Enjoy!

One Potato, Two Potato

Fried PotatoesI’ve heard the Irish are fond of their potatoes, but I suspect Americans are a close second when bestowing favoritism on tubers.  Baked, fried, roasted, or mashed, potatoes are not only a staple, they are comfort food.  This is probably what midwife Collie Mercer had in mind as she prepared a celebratory breakfast including fried potatoes for the Welles family to mark the arrival of the newest sibling, John.  Not to mention the hearty meal would sustain them on that cold December morning.

Fried potatoes are one of those dishes you learn to prepare by watching your mother or grandmother.  Recipes for fried potatoes probably exist but really all one needs is a little know-how.  Russets, America’s most popular potato type, are good for frying.  I use a mushroom brush to scrub the skins as I rinse them under cold water.  You can peel them if you choose.  One to two potatoes per person is plenty depending on the appetite of your guests and what else you may be serving.

Cut the potatoes into half-inch chunks and place them in a bowl of salted cold water until the task is complete.  This will keep the potatoes from turning an unbecoming shade of gray.  Drain the chunks and pat dry.

Grab your cast iron skillet as the non-stick variety will not get hot enough.  Peanut oil is the best for frying, but I imagine Collie made hers in butter.  When I use butter, it is unsalted.  In either case, the skillet should be hot enough that the oil will ripple on the surface without smoking or the butter will melt quickly and bubble.

Add the potatoes but don’t overcrowd the skillet.  Brown until crispy on the edges then flip the potatoes and repeat on the other side.  You can cover the potatoes at first, but be sure to remove the lid for the last bit of browning or they will be soggy.  Garlic, onions, and red or green peppers make tasty additions to this humble dish.  Season with salt and pepper to taste and serve hot.  Slices and shreds can be prepared in exactly the same way.

Enjoy!

Spread the Love

One of my earliest memories of butter includes sitting on the carpet in the kindergarten classroom, all of us in a large circle, passing a massive canning jar from person to person as we shook the sealed jar full of whipping cream as hard as our little arms could manage. We’d been told that this would produce butter. I remember my skepticism, but since I loved butter, I gladly took part and watched the magic unfold.

It’s funny how many of my food memories are attached to my Grandma Smith, but I believe her kitchen is where I developed my love of butter.Butter versus Margarine There was something different about the sunshine yellow block that sat in her cut glass butter dish. It was lighter, sweeter than the golden-colored sticks of ‘butter’ we used at home. As a young child, any yellow, creamy substance that one spread on toast or crackers was referred to as butter. My mother provided the explanation of the difference, and I learned the definition of margarine. It wouldn’t be until decades later that I learned what an evil substance margarine is, but I digress.

Grandma Smith would bring me packets of real butter from restaurants where she had dined. Nothing against my mother, but she used margarine for years until I finally convinced her to switch. Glory be–my taste buds rejoiced and food became so much tastier.

Where is all this leading you ask? To my novel, The Secrets of Dr. John Welles, of course. I’ve already established that as an author, I love to feed my fictional characters. Twice I reference butter specifically, once in conjunction with biscuits and again with cornbread, but what I want my readers to understand without mentioning it every time is that butter is my fictional characters’ ingredient of choice when it comes to cooking and baking.

As I wrote the scenes involving food and envisioned the preparation, butter was always in the picture, sitting in a crock or dish, just within reach of the experienced hands that would lovingly incorporate it into the recipe. I’ll spare you the debate on the health benefits of butter versus margarine and simply say don’t fear butter and all things in moderation.

To sum up this post, I made butter with my son because I wanted him to experience how easy and fun it is. The added step of washing the butter is new for me based on research for this post. The instructions for this activity follow. I highly recommend doing this with your kids because the memories you’ll make are priceless.

Enjoy!

Homemade Butter

2 c whipping cream (Raw cream from grass-fed cows is recommended, but store bought organic will work as well. This quantity will yield approximately ½ c of butter.)

sea salt

I used a stand mixer with a wire attachment for this process and chilled the bowl and wire attachment prior to using.

Pour the cream into your mixing bowl, filling the bowl halfway so it does not overflow as air is whipped into the cream. Mix on a medium-low speed to prevent splashing. As the cream thickens, you can turn it up to medium.

This process should take about 15 minutes but can vary depending on how much cream you are using and what type if mixer you have. Whipped cream will develop first. When the whipped cream begins to deflate, watch closely as your mixture can rapidly change to butter. To prevent splashing, cover the bowl with a lightly dampened tea towel.

When the butter begins to clump and stick to the whisk, it is done mixing. Pour the mixture through a fine strainer to separate the solids, butter, from the liquids, buttermilk. If you want it to last for more than a few days, you need to wash the butter. This will remove as much buttermilk as possible to keep the butter from going rancid. Put the butter back in your mixing bowl and cover with clean, cold water.

Use a large spoon to press the butter into the sides of the bowl. The water will become cloudy as the buttermilk is removed from the butter. Pour off the cloudy water and add more fresh. You can repeat this process until the water stays clear. Stir in a large pinch of amount of sea salt for every ½ c of butter.

Store in refrigerator or at room temperature if you will use it within a week or two.

%d bloggers like this: